Blog
Runtime Configuration

What are Feature Flags and How Do We Use Them? | Harness Blog

Learn how feature flags improve development with controlled rollouts and experimentation. Explore their benefits and implementation.
TL;DR

Feature flags enable developers to turn code sections on or off conditionally, facilitating controlled rollouts, experimentation, and rapid feedback. This practice enhances development velocity, reduces risk, and allows for seamless feature management across teams. Discover their types, benefits, and how to implement them effectively.

Building software is a great experiment. Many times we are required to do what has not been done before; this is core to innovation work. However, a lot of the iteration and experimenting tends to happen before software is shipped. That's where the concept of test in production comes into play. Building something from scratch or even jumping into an older project mid-stream requires lots of iteration.  

Once we deploy, for many software engineers, the experimentation on the existing tends to drop off and onwards to the next set of features in the backlog. Product owners/managers typically collect feedback to help prioritize the next set of features. From a software engineering perspective this can feel a little “chicken or egg-ish” - without a feature actually deployed in a production environment to get feedback, how do we if know we are on the mark?

Let’s illustrate this with an example. Customers are asking for an updated UI view for their dashboards; they want something that surfaces the most relevant information faster. Now that the product team has collected those requirements, it’s up to engineering to figure out how to best build it. There might be a few potential solutions:

  1. Create a hard-coded view of the dashboards that’s based on customer feedback and create that for each customer.
  2. Allow the customer to decide where they want certain visualizations with a drag and drop UI and give them powerful filters to decide exactly what they want to see.
  3. Build an ML solution that learns how the customer prefers to see information and then automatically makes changes to the dashboard that shows the most relevant information.

With some potential solutions decided, now it’s up to the engineering team to decide which of the three to implement. And before a customer ever sees it, they have to choose 1 of 3, build out the MVP over the next few sprints, and then ship it. This is the first time they’ll get any feedback, and if it’s not the right solution then it has to be built again!

Now, imagine if this new feature cycle could be improved for product development teams. If you’ve been paying attention to developer tools over the last few years, you might have seen a new category popping up: feature flags. Feature flags as a concept were born to increase development velocity and to solve this very problem through practices like progressive delivery.

While feature flags as a mature category of hosted tooling is new, feature flags - and what they solve - have been around a little longer. Let’s take a look at what feature flags have grown into, and how to use them.
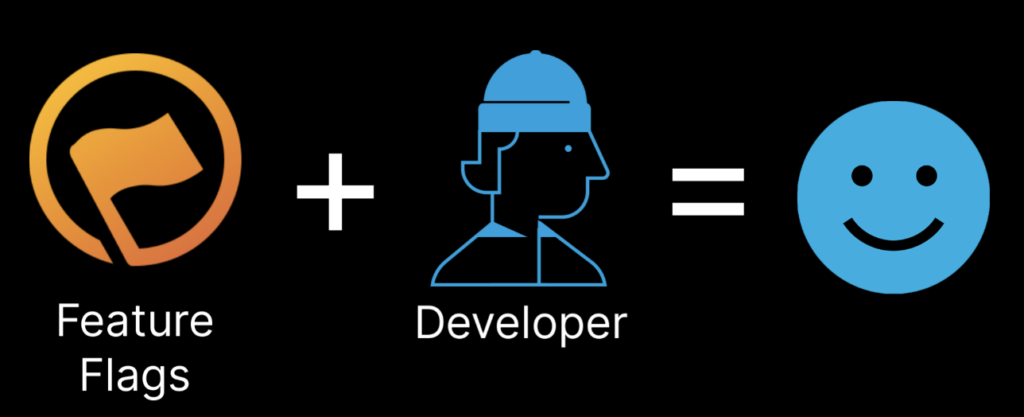
Feature flags plus a developer equals a happy smiley face, representing developer satisfaction.

The Story of Feature Flags

Feature flags, at their core, are the ability to wrap different versions of your code in conditional statements that you can turn on and off at will. You may have previously thought of them as app configs, or even part of your company’s rules engine. 

With Harness Feature Flags, we’ve taken these concepts you may be familiar with and taken them even further - adding more sophisticated rules, governance, user management, an intuitive UI, and more. 

Feature Flags lets you separate feature release from code deployment, build more effective strategies for rolling things out and testing with your users, and have more insight than ever into how changes impact your application performance.

Ultimately, feature flags give engineering teams the ability to deliver more features, with less risk. For leaders, it’s a great way to improve engineering velocity and developer experience, and to reduce the risk associated with feature development. And for developers, it’s a great way to work more efficiently, with less stress - think fewer late nights before a deployment, and fewer firefights post-deploy. 

What Are Feature Flags (or Feature Toggles)?

Feature flags are a way that developers can conditionally turn certain sections of their code on or off. You can think of feature flags as extending Continuous Delivery into Continuous Deployment(https://www.atlassian.com/continuous-delivery/principles/continuous-integration-vs-delivery-vs-deployment) - a way to put changes into production behind a flag and turn them on in a controlled way later (or hide and remove them in the same way).

But you can also think of feature flags as a new way to think about building and releasing applications - by clearly defining features and components that can be changed and toggled on and off individually, you allow for experimentation, controlled rollouts to different users, as well letting more people (like PMs, sales, and support) turn things on and off for customers.

Together, this results in giving more power and control to developers to create more and better features faster, while at the same time ensuring that engineering is not the bottleneck for the business in having to make changes for individual customers or ensuring a perfect production deployment for every new feature or feature update.

If we want to simplify even further, feature flags essentially create private swim lanes for developers where they can ship a feature directly to customers and then have control over who sees it, get feedback, and turn it on and off as needed. It’s like a light switch (a pretty complex one)!

Developers Able to Push their Own Features Without Interfering with Each Other
Devs don't have to push everything onto a massive pile of other features waiting to deploy.

Who Uses Feature Flags?

People oftentimes consider feature flags either an engineering tool, or a tool for product managers. The reality is, it’s both. Flags can help software development and DevOps teams lower their overhead and increase their velocity, and they can help product managers better control releases, coordinating launch timings and creating a feedback loop more effectively.

Research indicates that 95% of engineering leaders want to implement a feature flag solution for themselves. This comes on the back of 97% of leaders saying they’re under pressure to deliver faster, and 65% of whom say they find it difficult to achieve that velocity increase in a safe manner. It’s abundantly clear that engineering teams are likely the biggest beneficiaries of implementing and using a feature flag solution, and indeed, they tend to be the primary users. And when they do implement a feature flag solution, they end up delivering 66% more features per application per year!

Feature Delivery Statistics
Source

Feature flags are great for users across the organization beyond product and engineering. For sales and support teams, feature flags provide a way for them to directly manage betas and new features for their customers, and to track down who’s using what in case of any issues. And for management, flags can provide new forms of visibility into what’s happening in development and how new features are being tested with users.

On a ‘fun fact’ kind of note and since we’re in the ‘who uses feature flags’ section, it’s cool to note that big companies like Netflix, Flickr, Google, Reddit, and more use feature flags! They’re definitely worth looking into and absolutely are an important part of the software delivery lifecycle.

Multiple Teams Across an Organization Can Leverage <a href=
Feature Flags">Multiple teams across an organization can leverage feature flags.

Why You Should Consider Feature Flags

Whether or not the use of feature flags is important to your software delivery lifecycle comes down to what it is that you need to accomplish. While feature flags are a great tool to have for any team, they are particularly useful if you have these problems:

Problems in the Business

  • The risk associated with new feature releases ends up slowing down developers since they have to thoroughly validate design and implementation before releasing.
  • There are often multiple possible versions of how a new feature will look and function, and it’s up to the developer to choose one (not always the right one) and implement it.
  • The decision of when to release new software features is controlled by developers instead of the business.
  • Sunsetting old features introduces risk to newer features that might have dependencies on the old code.
  • It’s all or nothing - a feature is rolled out to everyone at the same time instead of doing a feature rollout incrementally for verification purposes.
  • When teams are beholden to engineering release cycles (e.g. once a month), multiple features are released simultaneously, introducing complexity and risk that can result in deployment war rooms, large rollbacks, and dissatisfied customers.

Problems in Engineering

  • Releasing a feature takes too much coordination and time across stakeholders.
  • Merging new features, or managing separate feature branches for changes, is cumbersome and complex.
  • You want to test changes to see how they impact your application and end-users before rolling them out more widely.
  • You want to provide access to new features, or to test changes with certain portions of the user base sooner - by location, by customer plans, by customers opting into beta testing, or by any other criteria or logic you can think up.
  • You want to reduce the risk of rolling out new code by having instant kill switches that don’t require rollbacks or new deployments to fix a disrupted environment.

To simplify, we can consider that feature flags are a great solution if you’re trying to do the following things:

  • Increase engineering velocity and ship more features.
  • Decrease feature development risk by A/B testing multiple solutions with customers.
  • Reduce the risk and toil associated with production failures and rollbacks.
  • Decouple engineering deployments from feature unveilings to customers.

Different Types of Feature Flags/Toggles

It’s natural to want to put all feature flag use cases in a single bucket, but it’s more helpful to instead view flags themselves as a means to an end and as having categories of use cases.

Here are some examples of the different kinds of flags that could be used in a system:

  • Release features - Using flags to let the right people decide who to turn a feature on for, and when, without complex engineering deployment coordination required.
  • Experiment - Using flags to learn something about how a change impacts things. This can be a technical experiment, such as how a new UI impacts server load, or it can be a user experiment such as how a new button impacts conversion.
  • Ops flags - Letting you have permanent control around key parts of your app so you can turn them on and off as necessary without a full new deployment cycle. Add in RBAC, and this is a robust way to control who has access to modify your production application. 
  • Control access - Using flags as a way to manage betas, early adopter list, trial access, and more.

Implementing Feature Flags

Implementing feature flags can seem really simple at first, but it turns out that like with any system, the devil is in the details. Building an awesome feature flag solution in-house certainly has its perks, but it can be deceptively difficult. In particular, we’ve seen three distinct sets of issues arise with feature flag solutions as an organization’s implementation matures.

Issues that Arise Along the Feature Flag Maturity Journey

When a feature flag solution is nonexistent or immature and an organization is standing it up for the first time, they tend to run into issues with finding value in the tool quickly. Especially with the need for such a solution and the pressure to make it happen quickly, it’s critical that value is demonstrated quickly, otherwise it may end up leaving a sour taste. Within that, there’s a dichotomy of architecting for eventual scale versus getting an MVP out the door to prove value. This often results in complex design or architecture that isn’t scalable and only works for small, targeted use cases.

As feature flag solutions enter a middle stage of maturity, or as they start to scale, the problem is quite obvious: scaling is hard. Especially if built in-house, ensuring that the tool can be used by multiple users and multiple teams for a variety of use cases, all while maintaining a common set of best practices and building on a single infrastructure can be incredibly daunting. And as this is being figured out and teams have code in production, it can quickly result in stale code or issues keeping production tidy when code changes occur. Add onto that the need to integrate neatly into everyone’s workflow and you’ve got a behemoth of a problem to solve.

Building on that is the scenario we often see with highly mature feature flag implementations, where they primarily end up as separate systems from existing software delivery or CI/CD pipelines that teams now have to learn how to use, and to figure out how to port their existing processes or pipelines into the feature flag solution. At this stage, there’s the obvious cost of maintenance and future development to keep up with new changes or requirements. Technical debt is bound to build up by this point, and it can become unmanageable without a dedicated team - and perhaps even its own codebase.

Sure, 95% of engineering leaders may want a feature flag implementation, but as it turns out, it’s not so easy to build something that works well over time.

Build or Buy: Feature Flag Management

You may be thinking, “Feature flags seem pretty simple, can’t we just build this ourselves?” 

The real answer? It’s complicated. 

We’ve seen in most cases that an internally-built tool will end up causing a lot of overhead and putting a very low ceiling on the benefits you can receive from feature flags. It may be good for your first couple of flags, but it can be hard to make an internal system scalable, performant, and robust for all the things flags can do as your organization gets more and more comfortable using them - and more reliant on them.

For a deeper look at the build vs buy conversation, you can check out an article we wrote earlier this month, Feature Flags: Should I Build or Buy?

Why Use Harness for Feature Flag Management

Harness provides a feature flag platform made for getting you up and running quickly while being able to scale to any level. We make it easy to get started and quickly see the benefits of feature flags. With Harness Feature Flags, that means you can get your first flag out the door in minutes by following three steps:

  • Create a free trial account.
  • Create a new flag in just 3 clicks.
  • Add one of our SDKs to your code in a few minutes.
Java code snippets showing how to define individual targets and targets with attributes for Harness Feature Flags

And, you’ve got a flag working!

If that’s not quite clear, then it’s worth knowing that the fundamental way flags work in an environment like Harness is that SDKs, added to your application as a library, will receive updates on flag statuses to evaluate with your users (you should choose between real-time streaming or pulling updates on intervals). These SDKs are secure, collecting no data you don’t want to share, and they are designed for performance and stability. 

Harness Feature Flags is fast, secure, and focused on helping teams get the most out of feature flags - from your first initial use all the way to global governance, sophisticated reusable templates, and developer-first experiences.

And if you’re wondering how we stack up against LaunchDarkly, Optimizely, Cloudbees Feature Management, Split, and other FF tools - those pages are being worked on right now and we’ll update this post with the links when they’re live! 

If you’d like a little more information on our architecture and on how to get started, you can check out the feature flag documentation or request a demo or try Harness FME for free.

Learn more: What is a Flag Trigger

← Previous:
Next: →

Related Resources

Add Feature Flags to Your Angular App in 10 Minutes

Runtime Configuration

Add Feature Flags to Your Angular App in 10 Minutes

October 18, 2021

Harness Team

+ more
Time to Read

Needless to say, Single-Page Applications (SPA) took over the web development world by storm. Like it or not, SPA frameworks are here to stay, and one of the most popular ones—Angular—will be the topic of this article.

Speed up development cycles, reduce release risk, and focus your team on DevOps best practices that create maximum impact. Get a personalized demo today!

This is what the tutorial covers:

  • Create an Angular app from scratch using Angular CLI
  • Build simple CRUD app using Angular components, services, models, and routing
  • Expand your app’s functionality with feature flags branching by Split
  • Dive deeper into Split features with event tracking and monitoring

What will the app be about? Hopefully, you’re a sports fan as you’ll be building a simple app to track favorite basketball players!

Prerequisites

To follow this tutorial on adding feature flags to your angular app, you should have:

  • Basic knowledge of how client-side web applications work
  • Basic familiarity with the command line
  • Beginner level understanding of Angular and TypeScript
  • Node.js and npm installed
  • A Split account

The full code example is available inside this splitio-examples GitHub repo if you prefer to follow the existing codebase while reading.

Bootstrap Angular App Using the CLI

Angular development team made it really simple to bootstrap a hello world example app. The only precondition is to install the Angular CLI on your machine locally, in case you don’t already have it.

This will now allow you to use the ng command(s) anywhere in your terminal. Position yourself wherever in the local folder structure you want to create the app project folder, and run:

No need to worry about creating the project directory. The CLI will create it for you as a child directory in whichever folder you run the above command. The --strict false flag will create a project without strict Typescript compiler rules, so you don’t get tangled up in compiler warnings in these early stages. You’ll get prompted for some information by the CLI console.

Navigate to the newly formed project directory:

Don’t get scared with the endless amount of files this operation generates. Besides application source code, the CLI’s app-bootstrap command creates additional files for unit and end-to-end (e2e) tests by default. You’ll want to focus on the content of the src/app folder, as the main part of Angular’s app elements – like components and services – are placed inside it.

To have a bit more sense of what’s going on here use this command:

The ng serve command launches the local server created by the framework, watches for file changes, and rebuilds the app as you save those changes. The --open (or just -o) option automatically opens the browser at http://localhost:4200. At this URL browser now renders a placeholder Angular page. You’ll be using the ng serve command a lot during the development. Each time you’d want to start the Angular server and see your app in the browser.

Take a look at the generated src/app/app.component.html file. It contains some placeholder HTML and CSS you’ll remove shortly and put in some of your own logic. But it’s important to notice that this template file has its TypeScript counterpart src/app/app.component.ts. Both of those files make up a key building element of Angular—a component. And Angular is all about components. The whole application is just a tree of components that starts with the top-level root AppComponent class exported from src/app/app.component.ts.

Replace the whole content of app.component.html with this and save:

The browser auto-reloads on save and now displays the name of your app in the place of {{title}}. And it actually displays whatever you put as the value of the title field inside the AppComponent class. Try changing it back in the TypeScript file and the name will change again in the browser. The bottom line is that properties defined on the component class level are bound to the template file of that component, and eventually displayed to the user in the browser through HTML markup. And it all happens dynamically, of course. These bindings between component (TypeScript) and template (HTML) represent workhorses of Angular and make it a great framework for building cool interactive client-side apps.

Build a Model, Build a Service

Let’s start building the basketball app. It’ll have two different screens (pages or client-side routes). The first screen will show the list of basketball players with some additional data and CRUD action buttons, while the other screen should display a form to add a new player. Each screen will be associated with a different component and both of those components will be communicating with shared classes—services.

It’s always a good idea to start with the model. Make a dedicated models folder placed inside src/app. Once in the models folder, create a file named player.model.ts and add the following inside it:

This will come in handy in all other files working with a player entity, as TypeScript will help maintain the type safety and ease up the development through the exposed IPlayer model interface.

The next thing in line is to create an Angular service. Services in Angular are tailor-made to extract pieces of logic that will be used by different components and shared across the app. Go back to the src/app and create a folder named services. Navigate to src/app/services and utilize the CLI to generate a service:

Replace the generated contents of player.service.ts with this:

Here you’ll be using a hardcoded list of players defined in the players field on the service class. You’ll be able to add or remove the players from the list by using addPlayer and deletePlayer methods. Obviously, this approach is used to simplify the tutorial. In a real-world app, you’d want to communicate with some server’s REST API to get, add or remove the data. This way, the whole state will be reset once the app gets reloaded in the browser, but that’s enough for the tutorial’s purpose.

Create Your First Angular Component

Off you go to the components. Navigate to src/app and utilize Angular CLI yet again to generate a PlayersComponent to display a screen for a list of players.

Replace the code in the players.component.ts file with:

Notice how this component exposes methods to add and delete a player. The deletePlayer component method is just forwarding the call to the deletePlayer service method, previously defined in the PlayerService. Therefore PlayerService is used as a dependency of the component inside the component class’s constructor. But you’re far from done here. The component still doesn’t render anything to the browser. Replace everything in players.component.html with this HTML code:

This code lists all the players defined in the PlayerService utilizing Angular’s *ngFor directive – an extremely popular one to render listed items in a loop. It also displays two different button types, one to add a player that invokes the addPlayer method defined on the component, and the other to delete a player that invokes the deletePlayer method, which gets rendered for each player row, and also “lives” in the component.

Styling HTML is not a focus of this article. However, to make the browser display more readable content you can copy the code from src/app/players/players.component.scss from the repo(https://github.com/splitio-examples/split-angular-basketball-app-example) and use it in the local players.component.scss file.

Angular Routing To Make It All Work

This all may sound logical, but you’re probably wondering how all these pieces of code lying around can be picked up to display something meaningful in the browser. For that, one more step needs to be done, and that is routing.

To build an Angular app with multiple routes (and in the real world, that is usually the case), you’ll need to create a routing module. Create a file called app-routing.module.ts and place it inside src/app. Add this code to the file:

This is how the routes are registered inside the Angular app. When a user navigates to /players, the PlayersComponent will render. If she navigates to any other route (marked with ** placeholder), the app will redirect to /players route. Probably you’re thinking it’s not too exciting to have just one route, but this code will start making more sense once we add another route (and another component) later in the tutorial.

If a user puts any route name in the address bar (or simply navigates via hyperlinks) there is no request for the new HTML page on the server. This is the core “feature” of a single page application – there are multiple screens rendered at multiple routes, but it’s all handled by Angular’s internal router that operates client-side exclusively.

The tradeoff is a bit bigger first load (because you need to load the whole Angular/JavaScript bundle needed to run the app), but subsequent navigation between screens (routes) is smooth and without any blank page flickering. Usually, the only requests your app makes after the initial load is to fetch various data from a server, often through a REST API.

You’re still not finished getting the routing in place. Replace the whole content of app.component.html with this single line of code:

router-outlet is a native directive of the framework (part of Angular’s own RouterModule which is imported inside AppRoutingModule) that instructs Angular where to render the content (meaning components) associated with different routes. In other words, at this place in the HTML file, the template bound to some component will be rendered as long as that component is matched to the route path inside AppRoutingModule.

You’re most probably seeing the Angular compiler error in the console now. Angular engine doesn’t recognize the router-outlet element if AppRoutingModule isn’t included as a dependency of the main AppModule. In the app.module.ts add the following line near the top:

Now add AppRoutingModule to the imports array of the module:

Finally, you can open the browser at localhost:4200/players and see the materialized list of three hardcoded players in front of you, luckily with some CSS in place.

__wf_reserved_inherit

The delete button should work as expected, but the same can’t be said for the one to add a new player. It currently leads to an unexisting route (which eventually redirects to the /players route, due to ** placeholder redirect rule), but you’ll get to that in the next chapter.

Using Angular Template Form

While in src/app generate one more component:

Replace everything in add-player.component.ts with:

The main purpose of the AddPlayerComponent will be for a user to create a new player via an HTML form and through the onSubmit method. The method receives Angular’s form instance and extracts the values from it before forwarding it to the addPlayer method of the PlayerService. The form fields are defined in the add-player.component.html:

The name of each form field is defined via the value of the name attribute, and Angular’s native ngModel directive takes care that user input gets mapped correctly. To use template forms in Angular, FormsModule provided by Angular needs to be included in app.module.ts (otherwise you’ll again bump into the Angular compiler error in the terminal). Add these lines to the app.module.ts file:

Again, if you want to use CSS styles referenced in the HTML above, just copy the contents of src/app/add-player/add-player.component.scss from the repo(*https://github.com/splitio-examples/split-angular-basketball-app-example) and use it in the local add-players.component.scss file.

Don’t forget to include the extra route in the app-routing.module.ts. First add the import statement at the beginning of the file:

Additionally, include the new route match rule in the routes array, just between the /players route and ** universal route.

And that’s all there is to it. Feel free to open the browser at localhost:4200/players now. The add player button should navigate to the fully rendered localhost:4200/add-player route where you’ll be able to interact with the form and submit it.

__wf_reserved_inherit

Once submitted, the app navigates back to the /players route. That is taken care of by the this.router.navigate(['/players']) line in the onSubmit method inside the AddPlayerComponent.

Making a Feature Flag

Applications get released in cycles and each version usually brings a new set of features. Adding features isn’t always easy. At times it can be a simple implementation from the technical standpoint but a game-changer in the user experience, so you’d want to be careful about releasing it to the whole app’s audience at once. On other occasions it’s something users won’t even notice, but it brings error-prone code changes or refactorings you simply can’t release without making a thorough regression test first. In both cases feature flags can help make those processes less painful.

A good practice is to introduce feature flags in the early development stages, so branching logic can naturally scale up together with your project. Another advantage of feature flagging is that, if used properly, the testing phase of your app can be completely moved to the production environment, which in the end is the most relevant one to test against.

As an example, imagine that you’re still not sure if the add/remove buttons should be present on the players’ list screen. You’d want to perform some kind of A/B testing where only 50% of the users will see the buttons, while others won’t, and you’ll track user feedback to reach the final decision on the positioning of the buttons. Which user gets what kind of display will be completely random and decided by a configured feature flag.

To create a feature flag, you’ll need access to the Split application. If you don’t have it yet, you should register for a Split account here to continue. After you log in to Split, go to the Splits section on the left, and click Create Split. In the dialog, you should enter the name of the split, which you’ll simply call player_split, and for Traffic Type select user. Leave the default settings for other fields and click Create to proceed.

__wf_reserved_inherit

The following screen is shown:

__wf_reserved_inherit

To add the split settings, click Add Rules.

One of the most important concepts in understanding how feature flags work is called treatment. The term is used to describe the state of a feature in Split. Every feature you’ll release through Split has at least two treatments. The default values for treatments are on and off, but custom values can also be defined. Later in the tutorial, you’ll use on treatment to show add/remove buttons, while the same will remain hidden for the users with the off treatment.

__wf_reserved_inherit

To define the targeting audience for this split, proceed with setting up the targeting rules. You’ll define a percentage split, and it can be set up inside the Set The Default Rule section. Percentage split means treatments will be randomly distributed between users in a predefined ratio, which is 50:50 in this case.

__wf_reserved_inherit

In a rare case the given split isn’t wired up to your application at runtime, the users will branch according to what you’ve set up inside the Set The Default Treatment section. Recommended practice here is to have the off treatment as the default one, as you probably don’t want new features to be accessible to all users, especially if those were not tested before the release.

Click Save changes, then click Confirm to save the split settings.

Create a Split Service in Angular

Back in the root of the Angular application, you’ll need to use the Browser SDK provided by Split to successfully integrate feature flags inside your app. More information about how to consume SDK APIs can be found here, but for starters just install the npm library @splitsoftware/splitio-browserjs.

Generate a dedicated split service where the whole logic regarding the feature flags will be encapsulated. While positioned in src/app/services run this command in the terminal:

Replace the code in the split.service.ts with:

There’s a lot of stuff going on here. The method initSdk is needed to connect to the Split API in the first place. You can’t use any of your configured treatments unless you initialize Split in the app. Since this initialization is a precondition to all subsequent Split-related actions, it’s good to call this method as soon as the application starts.

A Split SDK instance is stored in the splitSDK variable and created by invoking the exposed SplitFactory method. authorizationKey and key are two values needed to invoke the method. The value for the authorizationKey is the API key provided to you by Split.

Instead of the YOUR_API_KEY placeholder, you should use the one from the Admin Settings of the Split dashboard. Click the square workspace icon in the upper left. Click Admin Settings, API keys. The key you’ll need is the JavaScript SDK of the type browser for the staging environment – the first one from the list below.

__wf_reserved_inherit

For the key property you’d want to use a value that is unique for the given user of the application. Split assures a consistent UI experience for each user based on the value of key. In other words, as long as the same value is sent for key, the Split API will send back the same treatment. A good idea to send here is some kind of unique user identification.

The Split client instance is created by invoking the client method on the splitSDK object. Note how you’d need to register a listener based on the client’s instance Event.SDK_READY event. It’s important to catch that event because it will signal to the rest of your app that Split APIs are ready to use. If a part of the app would try to use a Split API (like getTreatment) before this event triggers, it would simply not work, as the API connection isn’t established.

As part of the event’s callback, the line this.sdkReady$.next() runs. sdkReady$ is a subject registered in the service that emits events to all of its subscribers, once Event.SDK_READY fires. Another method exposed on the SplitService is getTreatment. It provides a treatment value for the given split name, that is sent as a parameter while invoking the getTreatment function from the Split API. The method takes a split name as an argument, so you’d want to put player_split there, as that name is used while creating the split in the dashboard.

Wire up Feature Flags to Alter Angular Content

The code in the SplitService is still not put to good use. Start with initializing the SDK as soon as the app starts. The ideal place for that is inside the AppComponent (defined in app.component.ts). Since there is still generated code in that file, you should completely replace it with this:

There are two important things to notice here and both are related to some of the useful Angular features.

For the sake of the article the user identification will be pulled from the URL’s query param in the form of ?user=someone. There is an effective way to get the query params in Angular, by subscribing to queryParams observable exposed through the ActivatedRoute interface. The interface represents the route object where a given component (in this case the AppComponent) is rendered. User data is then forwarded to the initSdk method previously defined in the SplitService

All of the above is placed inside the ngOnInit method. It means this piece of code will run as soon as the OnInit lifecycle hook gets triggered. It happens when the AppComponent gets initialized, at the very start of unfolding the Angular’s component tree.

To show or hide places of the UI based on data given by Split API, there are still few changes needed in players.component.ts. Import a reference to the SplitService at the top:

Add a line just above the constructor to declare a flag for displaying crud buttons:

Inside the constructor, add a new dependency to SplitService:

Finally, add the ngOnInit method where you’ll get subscribed to sdkReady$ subject:

In the sibling HTML file, players.component.html, only two lines need to be changed. You’ll add one of the most common directives in Angular – *ngIf – to conditionally display the buttons. Replace the button tags already there with the following:

You’re now ready to test the feature flag.

Open localhost:4200/players?user=john in the browser (make sure your Angular server is running) and open the DevTools with F12 (if you are using Chrome). Position yourself to the Console tab in the DevTools. If the connection to Split SDK is established the code inside the ngOnInit method of PlayersComponent should successfully fetch the treatment for the user based on the value inside the query params (john). The treatment value is logged in the console, and it either shows or hides the crud buttons. Remember, since we configured a percentage split, you don’t know in advance if the buttons will be shown or hidden (the chance is 50% for both).

However, what you should rest assured with is the following:

Every new request for the same URL (localhost:4200/players?user=john) should give you back the same treatment since the user identification (key) didn’t change (it’s still john).

You can check this by refreshing the URL multiple times. The appearance of the buttons should remain in the same state as in the first load. But, if you want to change that state, try changing the URL’s query param. If ?user=tim gives you the same result, try ?user=angela and so on, until you get the buttons shown or hidden.

The only rule is that, once you get the treatment for a given user for the first time, it stays consistent for the user, as long as you don’t reset it via the Split dashboard. That consistency is one of the key Split features.

Events and Monitoring at Split Dashboard

Besides creating flags, Split offers a palette of various services. One of those is tracking and monitoring the behavior of flagged features and their users in the real world. Split client instance exposes .track() method that receives up to four arguments:

  1. Traffic Type: The traffic type of the key in the track call. You’d want to use the same value that you added to the traffic type when creating a split (user).
  2. Event Type: Basically it’s the name of the event in the Split monitor panel and it can be set to any value. In this example, you’ll use the value user_age_group, as you’ll want to track the app’s users by age, to see where most of your audience comes from.
  3. Value: Optional metric value for the specific user, it’s a dynamic piece of data that changes between users.
  4. Properties: Optional set of additional properties

To learn more about tracking APIs explore Split docs.

To show how events are working let’s create a simple loop that will send tracking information to Split. In the split.service.ts expose a new method called fireManySplitEvents:

The code in the loop will run every second, and after ten seconds the interval will be canceled. For each iteration, it’s needed to connect to the Split API as a different user, so the initSdk method is called with a random argument to emulate an unique user identifier (Math.random().toString()). Each mocked user will then get her treatment of the player_split; and most importantly, it will send randomized tracking data about her age group. Notice how the track method receives three arguments: traffic type user, event type user_age_group, and a random age group value. Options are omitted, as you don’t need additional customization here.

In a production app, you’d want to send an event value based on some real piece of information fetched from the user object, browser environment, or any other relevant data source.

Make sure fireManySplitEvents gets called by adding it to app.component.ts, at the end of ngOnInit method:

Before opening the browser, open the Data hub in the Split dashboard by clicking the icon on the left menu. Use the dropdown and change the Data type to Events.

Click the blue Query button.

__wf_reserved_inherit

Data hub will now show the event data in near real-time, as it arrives at Split servers. Open your browser at http://localhost:4200/players (or refresh it if it’s already opened – in both cases the tracking event loop should fire), and observe what happens on the monitoring screen in Split. You should be able to see the generated events:

__wf_reserved_inherit

Notice how all the records have the same event type (user_age_group), but a random key (that is the user identification), and random metric value (varying from 20 to 50). You can pause live tracking at any moment by pressing the pause icon. Hopefully, this was a vivid enough example of how Split is more than just a flagging tool. Possibilities with event [tracking and monitoring] are huge and give you a chance to fine-tune it by your needs.

Removing the Feature Flags from Angular

It’s simple to remove the feature flag if you don’t need it anymore. Just remove the *ngIf directives from the players.component.html and the contents of the ngOnInit method inside player.component.ts. If you’re worried the Split APIs won’t be available in your app anymore – don’t be – as the initSdk method is completely decoupled from all other split-related actions. That means the invocation of initSdk inside app.component.ts stays as is, and if you need to connect to new treatments in the future it could be easily done, as you’re already connected to the Split API.

Final Thoughts

Congrats, you made it to the end of the tutorial. If you’re just getting started with Angular, hopefully, this cleared up your foggy landscape a bit. And if you already have significant experience in the framework, maybe you found some useful tips on how to split(!) client-side logic between components and services or just using the Angular CLI. But in both cases, you can probably take some relevant feature flag knowledge with you.

It’s been shown how various UI outcomes for web applications’ end users can be configured exclusively via feature flags, which deliver a consistent user experience. Once you get accustomed to Split, the sky’s the limit, as there are numerous ways and strategies on how to use and test feature flags inside your codebase at different points of the application development lifecycle.

Learn More About Adding Feature Flags

Ready to explore feature flags? Here are a few articles to get you started:

To stay up to date on all things in feature flagging and app building, follow us on Twitter @splitsoftware, and subscribe to our YouTube channel!

Get Split Certified

Split Arcade includes product explainer videos, clickable product tutorials, manipulatable code examples, and interactive challenges.

Deliver Features That Matter, Faster. And Exhale.

Split is a feature management platform that attributes insightful data to everything you release. Whether your team is looking to test in production, perform gradual rollouts, or experiment with new features–Split ensures your efforts are safe, visible, and highly impactful. What a Release. Get going with a free account, schedule a demo to learn more, or contact us for further questions and support.

Split and Stable Diffusion:  Feature Flags With Generative AI

Runtime Configuration

Split and Stable Diffusion:  Feature Flags With Generative AI

April 8, 2024

Harness

+ more
Time to Read

Stable diffusion is a type of deep learning AI model that generates images from textural descriptions. It belongs to a category of models called ‘diffusion models’. These models start with random noise that they repeatedly refine into an image that matches the textural description that you send to it. 

One of the key features of stable diffusion is that it is optimized for consumer grade hardware. Anyone can run it on a modern computer, though it will take advantage of high performance video cards (GPUs) for accelerated processing. 

Stable diffusion is open source, it is available and accessible to any developer or creator that wants to use it in their work. New contributions and custom models have been created to extend the work that was done for stable diffusion for various use cases. Civitai is a popular place to host such models and they have them organized and tagged so you can find models that are highly tuned for what you’re trying to do–such as to help make images for realistic buildings or vehicles, for example.

Testing Generative AI Models: The Use Case

This is all fine and well, but you might want to try out a couple of different models for your particular use case. 

Let’s say you host a fantasy video game application. And as part of that, for every user that signs up, they get an automatically generated image created for them based on their character’s description. Creating these images is fun. Many users seem to really like this personalized part of the game experience. 

Generating these images is fairly computationally and time intensive though, and you’re looking to experiment to see if you can save some compute costs without damaging your well earned reputation among the players that enjoy your game. 

You want to test a few things to reduce the compute required of the image generation. First, would be to reduce the size of the image. Secondly, we’d want to reduce the complexity of the prompt we’re using–reducing some of the additional words we use to make the fantasy image prompt smaller. Finally, we may want to also test different diffusion models to see if one is more efficient than the other.

Starting Code

We can start with a basic Stable Diffusion code sample. In this sample we are running diffusion on the CPU, but you can change the pipeline to use cuda cores on your GPU if you have them by changing the value from pipeline.to(“cpu”) to pipeline.to(“cuda”)

The image output from this model can be seen below. Pretty nice!

Futuristic orange and silver vehicle with garbled text, representing the initial Stable Diffusion model output

Setting Up Our Feature Flags

Now, of course we talked about the three pieces of our code that we want to make parameterizable. 

  1. Image size
  2. Prompt complexity
  3. Stable Diffusion model. 

Let’s go into Split and make flags for each of these.

Creating the Flags in Split

For the image size, we will make a flag called backEnd_imageGenerator_makeSmallerImage and we will tag it properly to ensure that other teams working on AI and Stable Diffusion based features are aware of it.

Creating a feature flag named backEnd_imageGenerator_makeSmallerImage with AI-Team and Stable-Diffusion tags in Split

We will do this for our prompt complexity flag as well, we will call it backEnd_imageGenerator_makeSimplerPrompt

Creating the backEnd_imageGenerator_makeSimplerPrompt feature flag in Split with AI-Team and Stable-Diffusion tags

And finally, for the model itself, we will explore using an updated model from a group called RunwayML. This would be Stable Diffusion 1.5. We will create this flag and call it backEnd_imageGenerator_useStableDiffusion15.

Syntax section and status indicators in the Split feature flag configuration interface

Now that we have our flags created in Split, we will need to update our code to use them.

Using the flags in Code

The first thing we will need to do is import and instantiate the Split Python SDK

We will do this after the other imports and before the generate_images function is defined. You will also need to replace the YOUR_SDK_KEY with a server side Split SDK key. If you are an administrator this can be retrieved from the Syntax option at the top right of the flag definition:

Create a feature flag form in Split named backEnd_imageGenerator_useStableDiffusion15 with user traffic type

Now that we’ve imported Split and instantiated the Split SDK, we can use it to parameterize our code using feature flags. 

The first place we want to look at is the image resolution. We want to look at any effects from reducing it from 512x512 to 384x512. 

So let’s look at what it takes to do that:

Now let’s do this for the prompt as well.

Notice we removed the ‘highly detailed’ from the prompt in order to test if that might be something people might not notice but could make the image generation simpler. 

Finally, we can look at adding parameterization for the actual model itself.

Now that we’ve added code to control these parameters via code, we can go into Split’s console and enable or disable them as needed.

Final Code

Here is what the code with all 3 flags in it looks like:

And here’s what an image generated with these new parameters looks like:

Stylized, colorful astronaut in a spacesuit generated by Stable Diffusion using the configured feature flags

Future Experiments

We can now also proceed to do a percentage based rollout to look at metrics we might be interested in, such as image generation time or CPU usage during the image generation process. 

We might also review metrics such as engagement or in-game purchases to see if the updated images have any effect on those, positively or negatively.

With Split’s IFID  functionality you will know which feature is impacting your metrics.

We can also experiment with using Split’s Dynamic Configuration to hold parameters used within the feature flagging system itself.  

Overall, feature flags allow us to have fine grained control over the image generation process for Stable Diffusion like parameterized image generation tooling. We can use this for evaluation and testing of different approaches for an application, letting us use statistically proven methods to answer questions on application performance, user engagement, and much more.

Switch It On With Split

The Split Feature Data Platform™ gives you the confidence to move fast without breaking things. Set up feature flags and safely deploy to production, controlling who sees which features and when. Connect every flag to contextual data, so you can know if your features are making things better or worse and act without hesitation. Effortlessly conduct feature experiments like A/B tests without slowing down. Whether you’re looking to increase your releases, to decrease your MTTR, or to ignite your dev team without burning them out–Split is both a feature management platform and partnership to revolutionize the way the work gets done. Schedule a demo to learn more.

Get Split Certified

Split Arcade includes product explainer videos, clickable product tutorials, manipulatable code examples, and interactive challenges.

Get Started

Get Started with Harness AI

Try the full platform free. No module restrictions, no credit card.

Bhargav Brahmbhatt
Product Marketing Lead
bhargav-brahmbhatt
Bhargav Brahmbhatt