
Harness Pipeline Templates enable organizations to standardize, reuse, and scale their CI/CD processes, significantly reducing DevOps costs and improving deployment efficiency by automating and streamlining software delivery workflows.
Everything that ties to DevOps promotes automation in one or the other ways. Development teams are expected to write code with high velocity so the Ops can release features to the customers with the same high velocity. Developers always look for ways to automate their tasks; several tools help them do so. Maintaining a standard set of rules and a cultural mindset is crucial in the teams. A positive culture promotes developer experience as well as productivity. While the path of DevOps starts with Continuous Integration (CI) and Continuous Delivery (CD) at many organizations, the tools and platforms make it different.
In this blog, we will discuss ‘Pipeline Templates’, what they are, how to configure Harness Pipeline Templates as an example, and finally, the best practices that organizations can follow to scale their CI/CD maturity with such templates.
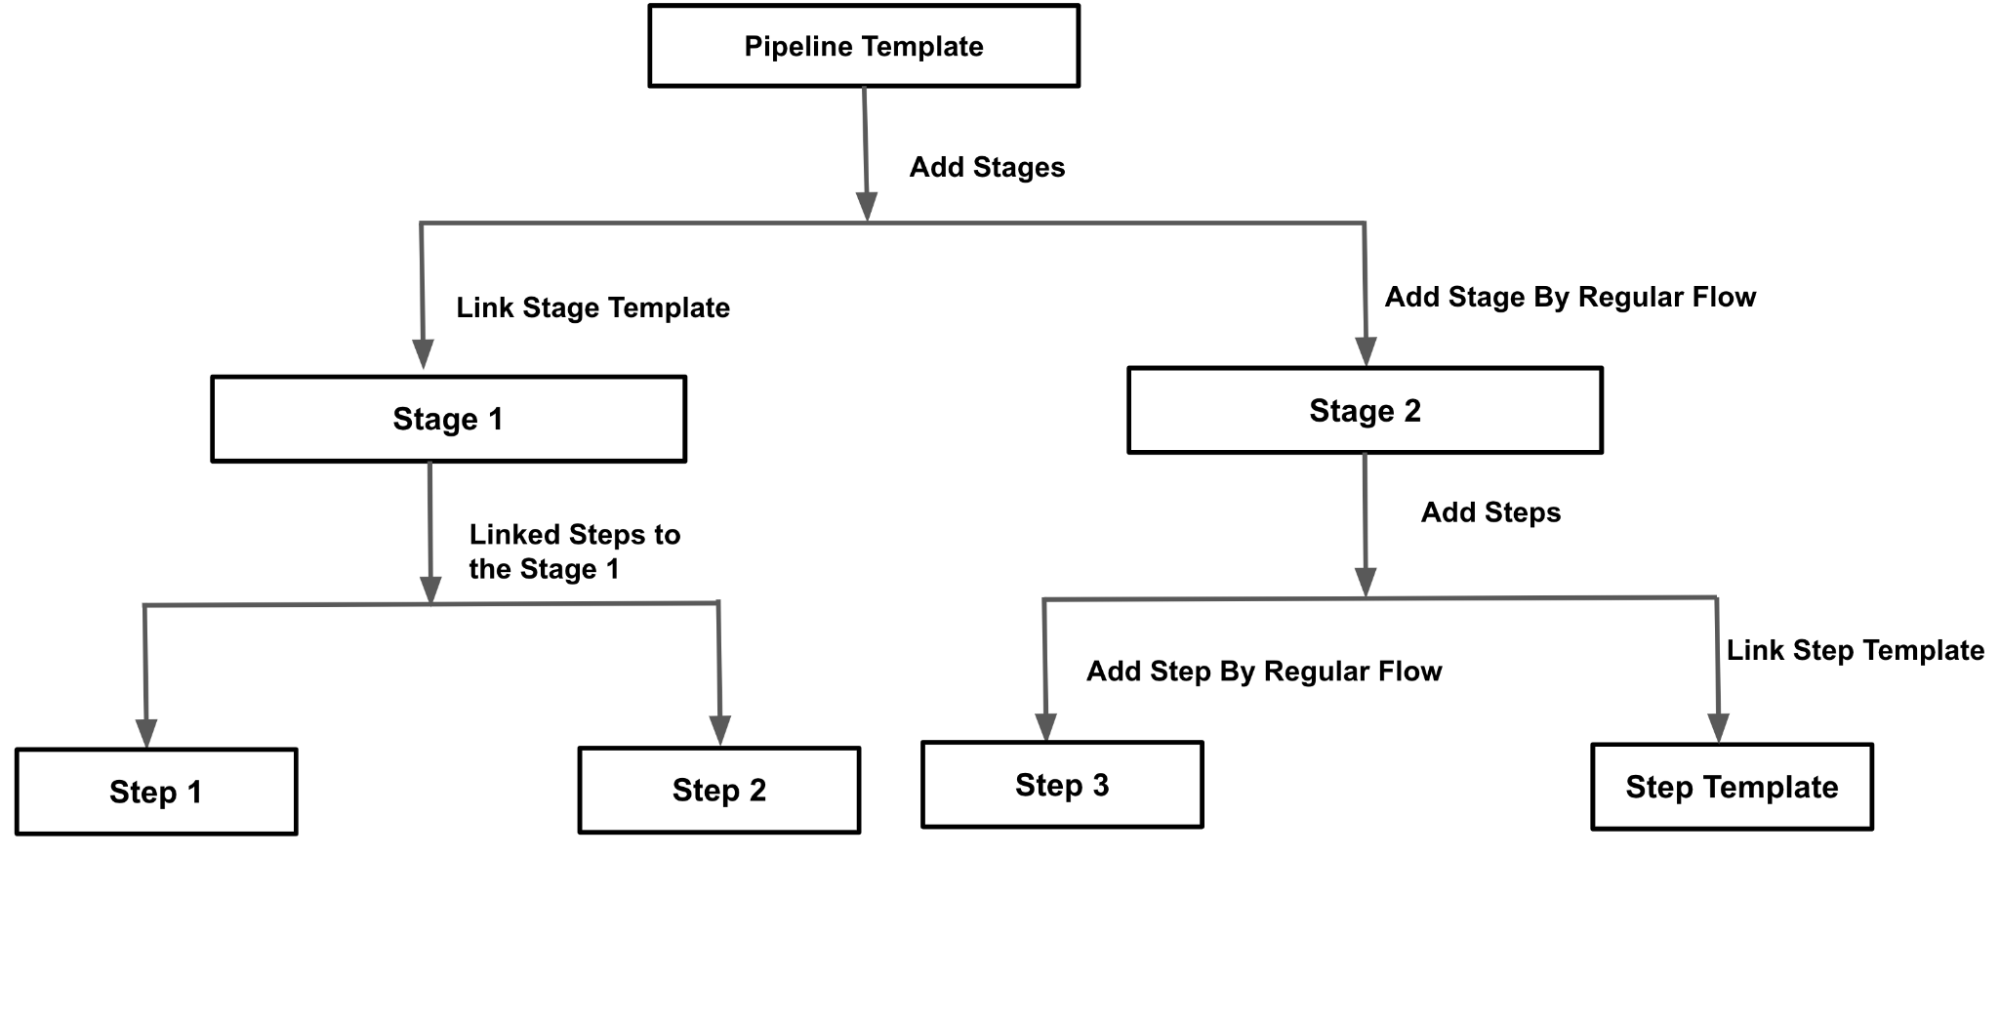
What are Pipeline Templates?
Templates are predefined configurations or blueprints that enable users to quickly and consistently provision infrastructure, deploy applications, and define workflows. In the context of Harness, a modern software delivery platform, templates serve as reusable patterns for defining and automating various stages of the software delivery process.
Harness templates typically include settings and parameters specific to a particular task or workflow, such as provisioning infrastructure on cloud platforms, deploying applications to different environments, or executing tests. Templates can be created and customized within Harness to match the unique requirements of an organization's software delivery pipeline.
When working with templates in Harness, users can select and apply them to create and manage resources or perform specific actions. Templates offer flexibility and efficiency by abstracting complex configurations into reusable components, promoting consistency and reducing manual effort. They also help standardize the software delivery process across teams and projects.
A Pipeline Template allows you to easily share pipelines among other teams or within your own team. This saves you time and effort by providing pre-set parameters and configurations for the pipeline rather than starting from scratch. By adding a Pipeline Template, you can automate building code into artifacts followed by deploying those artifacts into live services. You can choose from several Templates, such as the Build stage for pushing artifacts to the registry, running tests, and security scans. The Staging deploy stage can be used for deploying to Dev and QA followed by an Approval stage for PROD approval. Finally, the Prod deploy stage can be used to deploy to Production.
By leveraging templates in Harness, users can easily define and manage their software delivery workflows, ensuring a streamlined and automated approach to building, testing, and deploying applications.
Why use Pipeline Templates?
CI/CD Pipeline sprawl refers to the proliferation of multiple, divergent, and uncoordinated CI/CD pipelines within an organization. It occurs when teams or individuals create pipelines in an ad hoc manner without considering standardization, reuse, or consistency across projects. This can result in a chaotic and inefficient pipeline landscape.
Using templates in CI/CD pipelines is beneficial for several reasons:
- Standardization: Templates enable the establishment of standardized practices and configurations for CI/CD pipelines. They provide a consistent framework for building, testing, and deploying applications, ensuring that teams follow best practices and maintain a uniform approach.
- Reusability: Templates allow for the reuse of pipeline configurations across projects. Instead of reinventing the wheel for each new project, teams can leverage pre-defined templates to set up pipelines with proven configurations quickly. This saves time and effort while promoting consistency.
- Scalability: Templates facilitate scalability by providing a scalable infrastructure for managing CI/CD pipelines. As the number of projects and pipelines grows, templates make it easier to manage and maintain pipelines in a centralized and organized manner.
- Collaboration: Templates foster collaboration and knowledge sharing among team members. By using templates, team members can easily understand and contribute to each other's pipelines. It encourages collaboration and promotes a sense of shared ownership of the CI/CD process.
- Maintainability: Templates simplify the maintenance of CI/CD pipelines. When updates or improvements need to be made, modifying a template ensures that the changes propagate to all pipelines that use it. This reduces the maintenance overhead and avoids inconsistencies arising from manually updating each pipeline.
Creating Different Types of Pipeline Templates on the Harness Platform
The output of the Templates would be a template.yaml file that consists all the details of your pipeline (including stages and steps) and it would look like this.
The quickest way to get started from a zero state is to use the Harness UX the first go. So, let’s see how to start creating these templates.
First things first, sign up to Harness account with CD free plan.
When you signup and login to your Harness pipeline dashboard, on the left-hand side, you should see the ‘Templates’ tab under ‘Project Setup’.
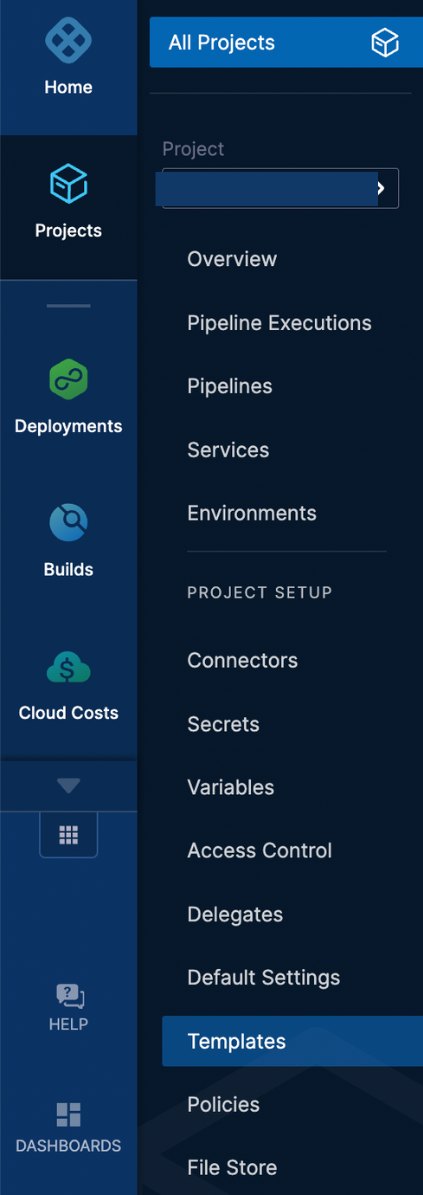
Click on ‘Templates’ to create new templates.
When you click on ‘New Template’, you will see several options to create templates, as shown below.
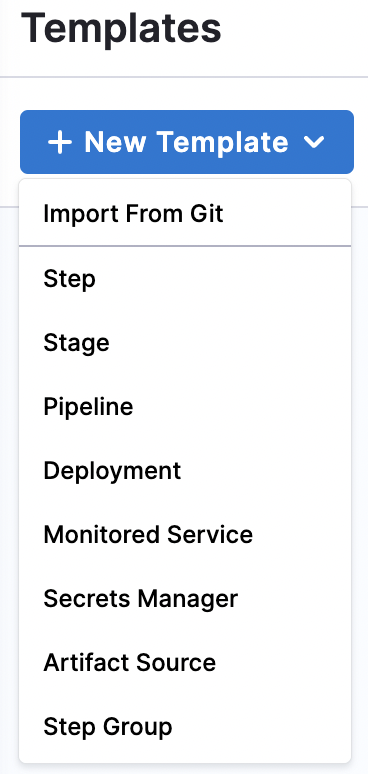
Let us show you how to create Step, Stage, and Pipeline templates.
Step Template
In the Harness, using Step Templates allows for the templatization of individual steps within a pipeline template. Let's say you have 26 different pipeline templates, each representing a specific deployment process. Within each of these pipeline templates, a common step involves deploying a container to a target environment. Instead of manually configuring this step in each pipeline template, you can create a Step Template for the container deployment action.
The Step Template encapsulates the instructions, configurations, and parameters required to deploy the container. It could include details like the container image, environment variables, resource allocation, and deployment strategy. Creating a Step Template lets you define this deployment process once and reuse it across all 26 pipeline templates.
Note: A specific set of Steps can also be combined into a Step Group Template. We won’t be covering the step group template in this article.
Click on ‘New Template’, and select `Step` as the option.
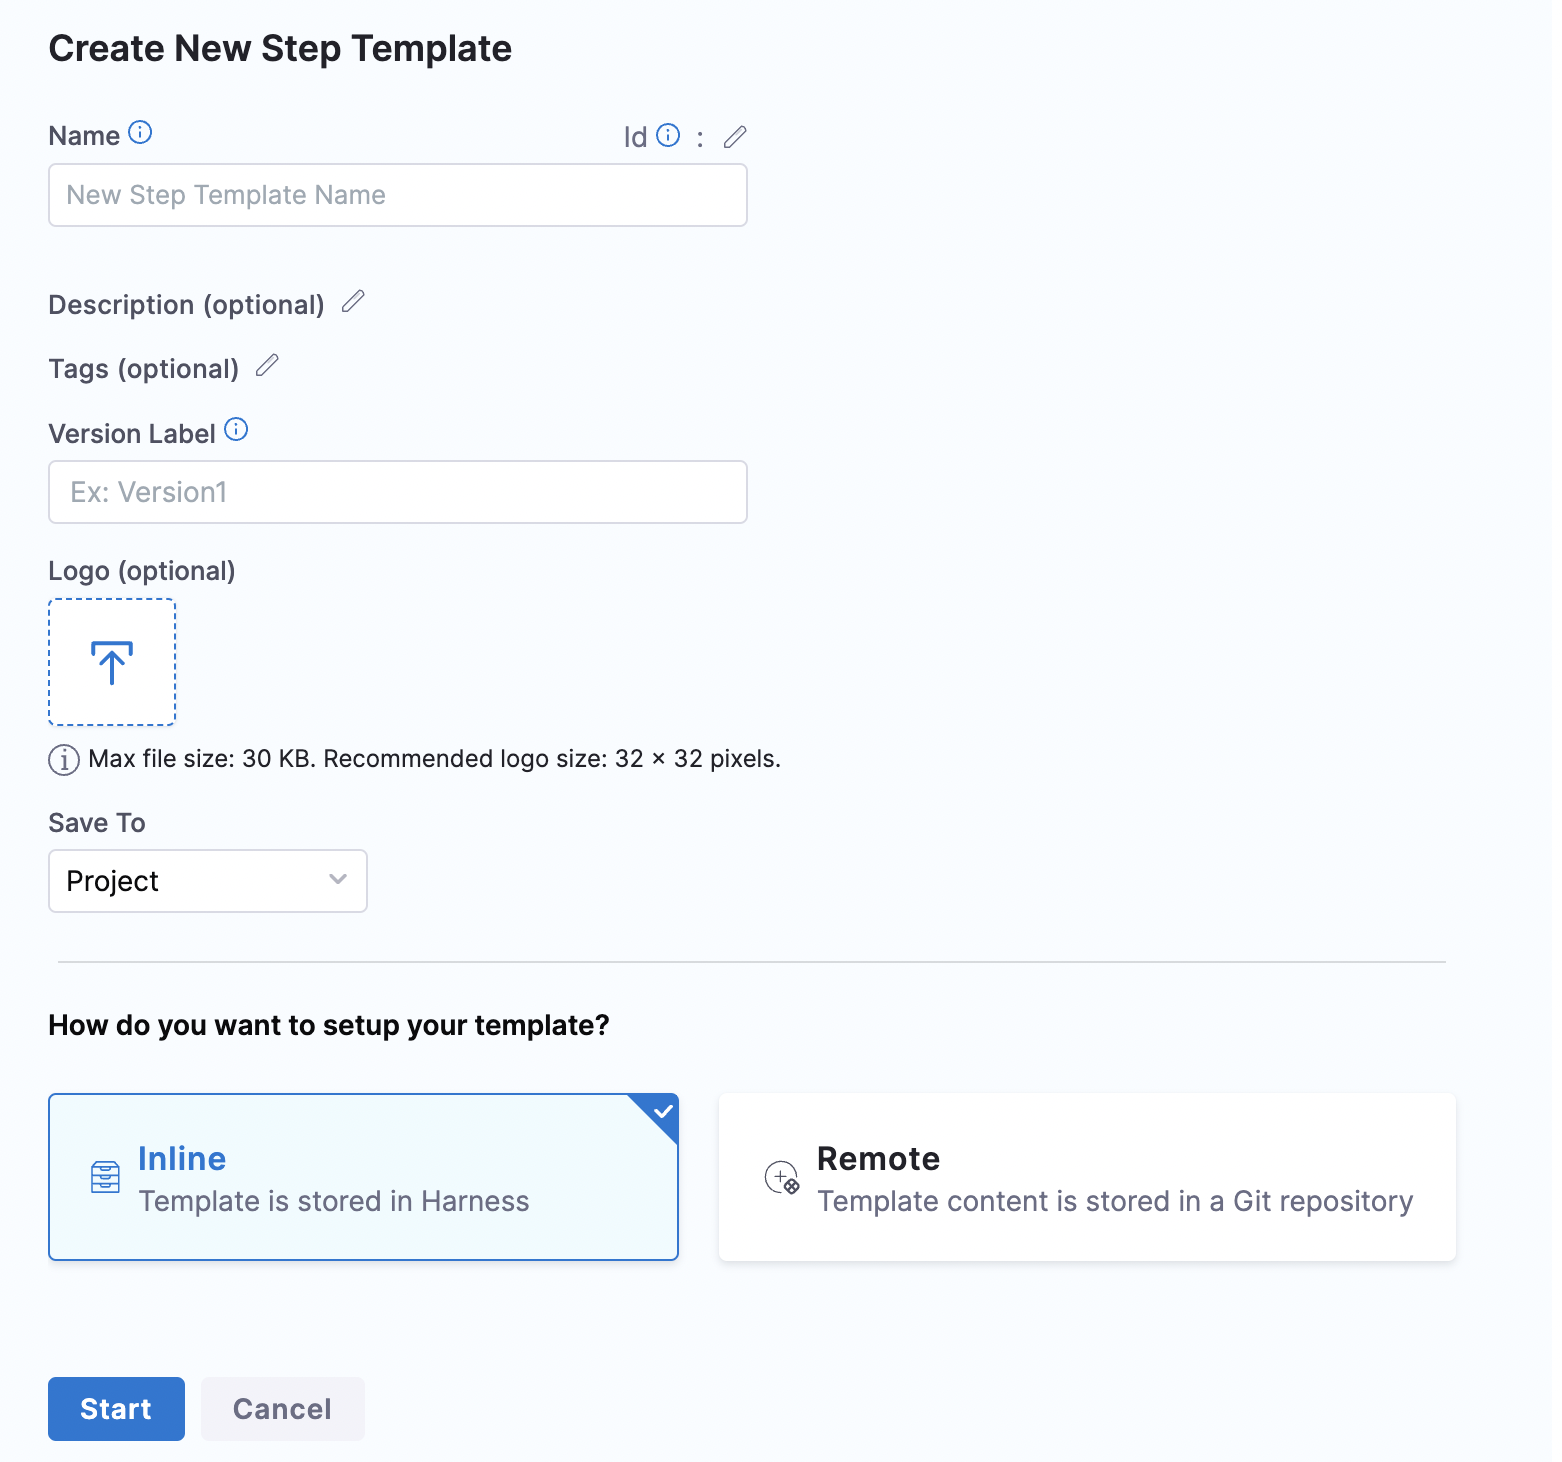
Name the Template, add a version label and mention where to save it from the three options Project, Organization and Account. Let’s select Project in this tutorial.
Click ‘Start’ to continue, and you will be presented with the step library with various options.
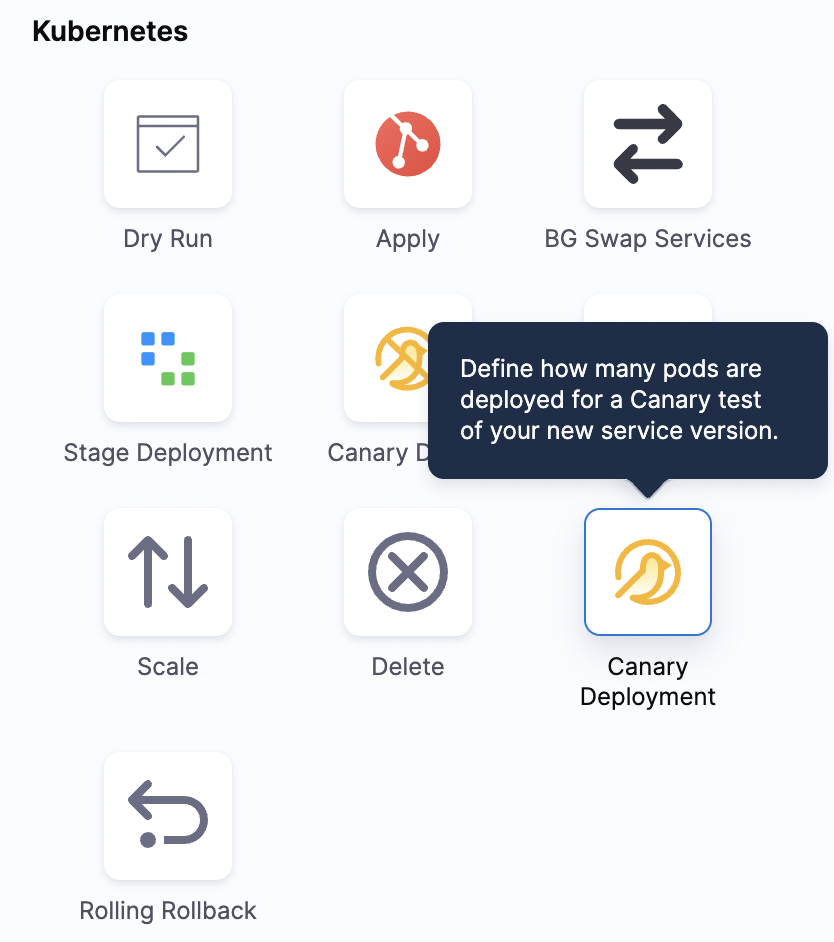
Let’s select ‘Canary Deployment’ from the list under Kubernetes.
Add the required details in the step.
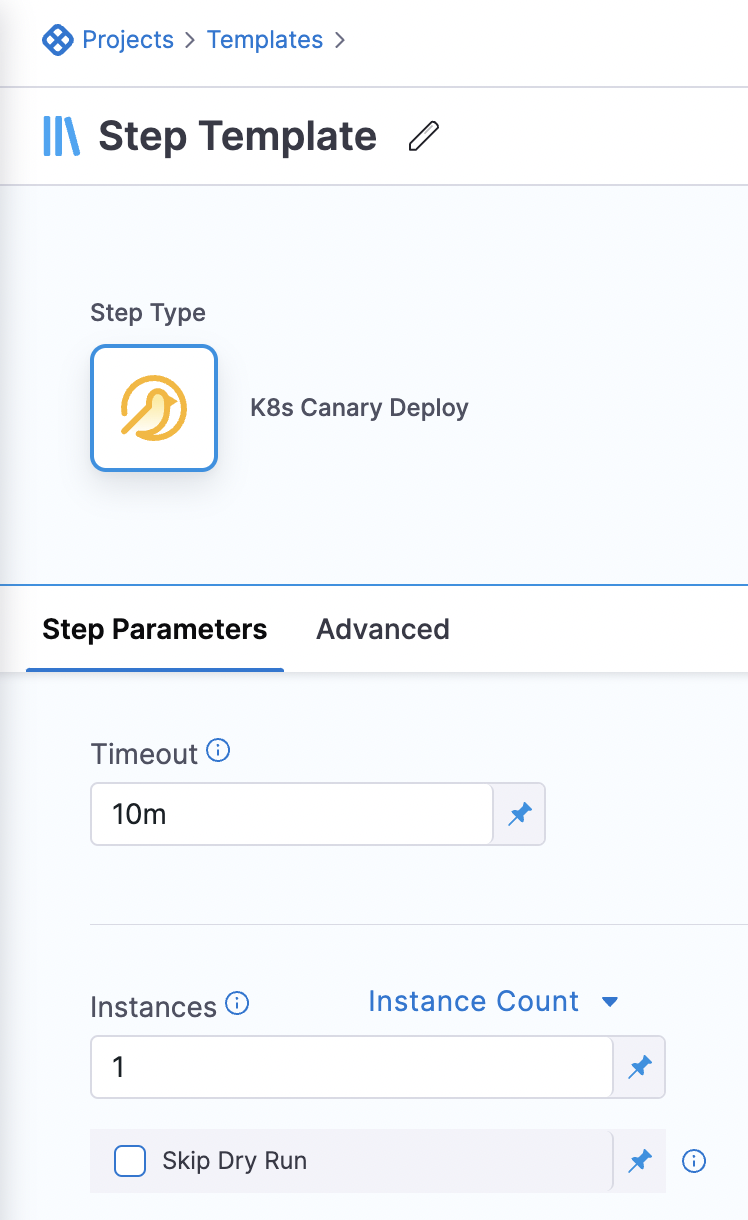
An ‘Advanced’ tab has more options to add to your step where you can set up conditional execution, failure strategy, looping strategy and command flags.
After all the setup and step configuration, you can save the template.
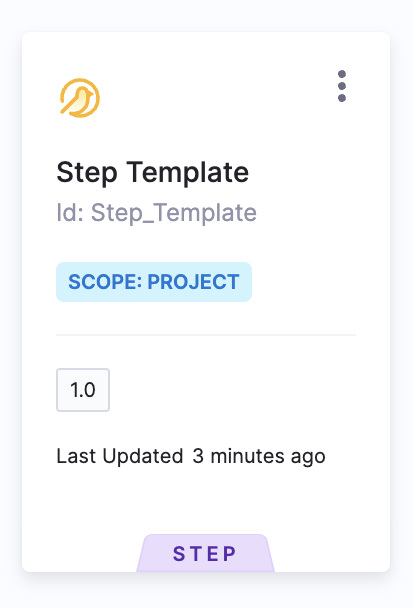
Now, get back to the Templates tab; you should see the recently created template there.
Stage Template
A Stage Template in Harness allows you to templatize a CI (Continuous Integration), CD (Continuous Delivery) stage or any other custom stage.
The primary motivation behind using Stage Templates is to promote reusability and consistency across different deployment processes. When you have multiple pipeline templates, you may find that certain stages, such as CI (building and testing an application), are repeated across those pipelines. Instead of recreating and configuring these stages individually in each pipeline, you can create a Stage Template.
Click on ‘New Template’, and select `Stage` as the option.
This time, let us show you how to store your templates in your own repositories. Below you can see instead of ‘Inline’, we will select ‘Remote’ and connect our GitHub repo. Create a PAT (Personal Access Token) to connect your GitHub repository. Here is a guide on how to create a PAT.
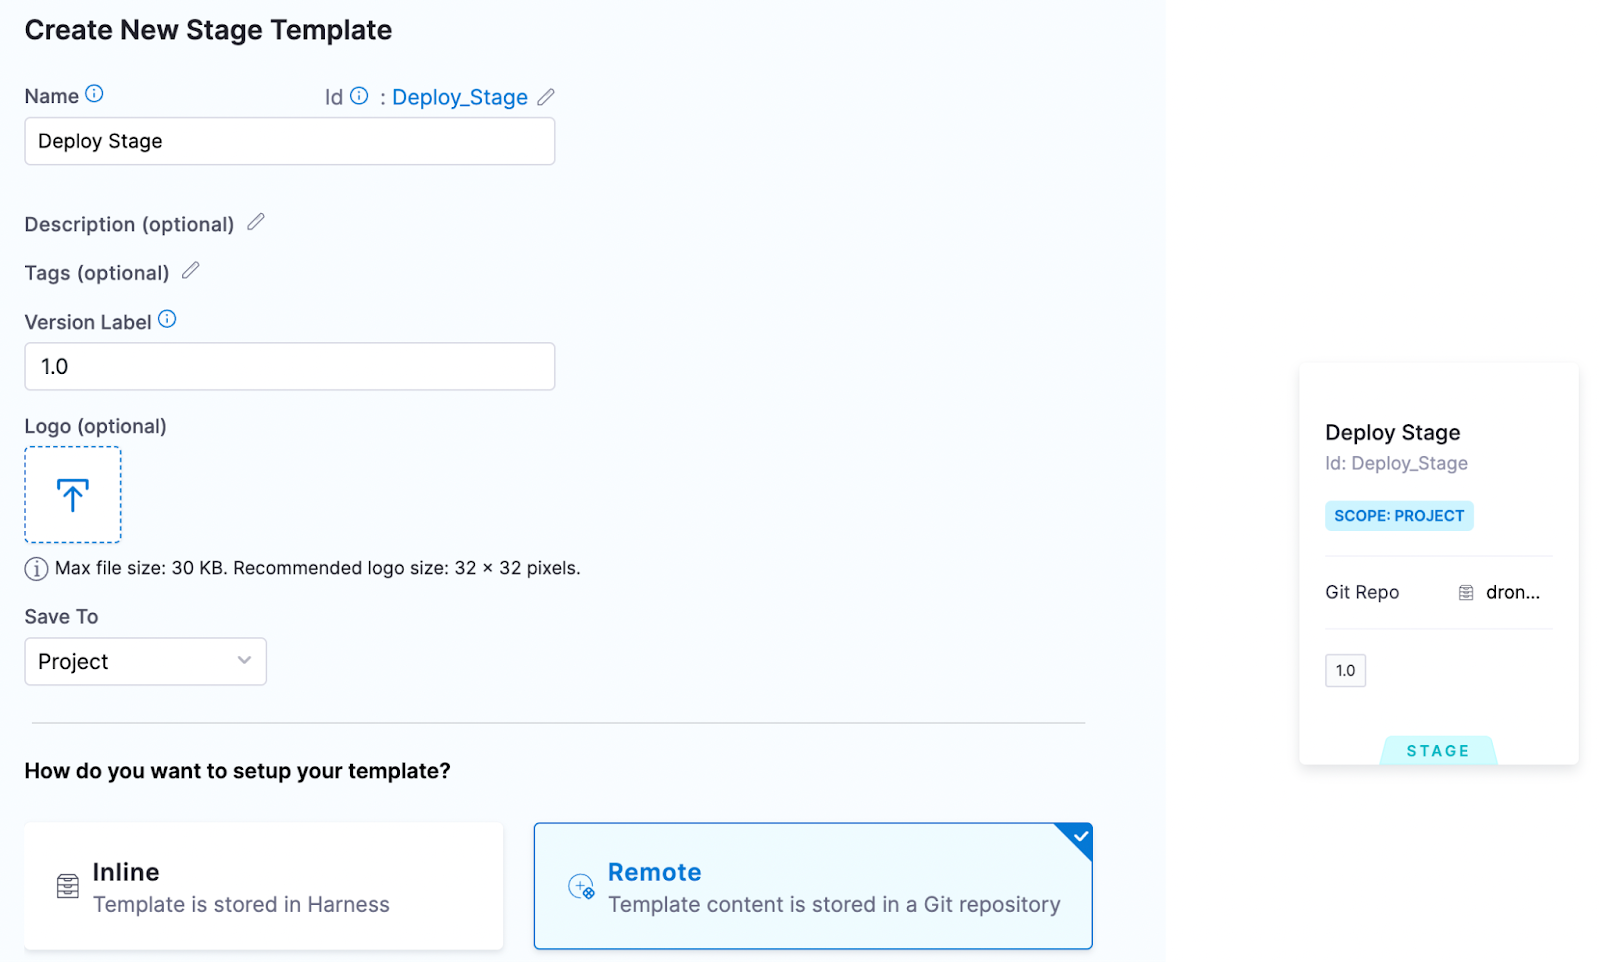
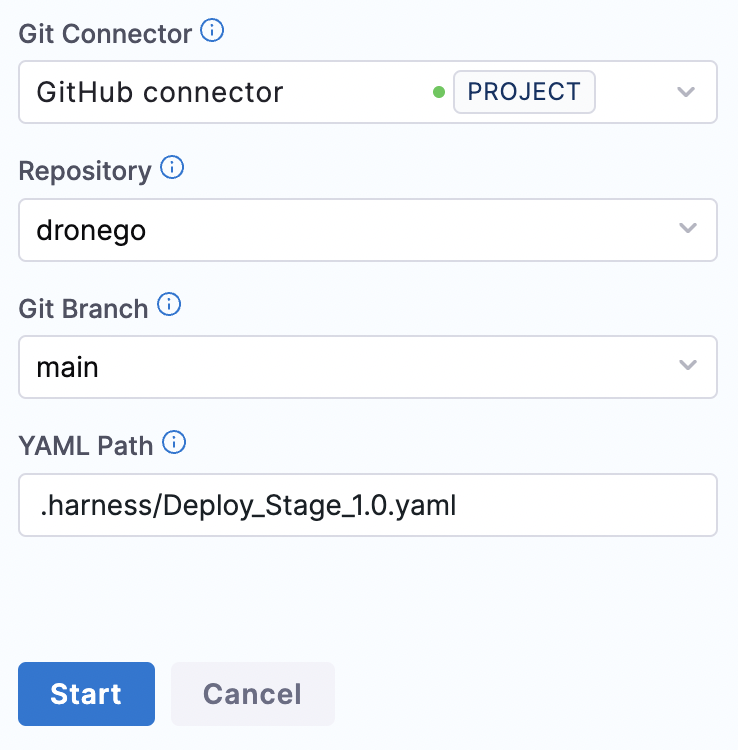
We will specify the repo to be connected, branch and YAML Path gets generated automatically for us. Click ‘Start’, and you will land on the pipeline studio.
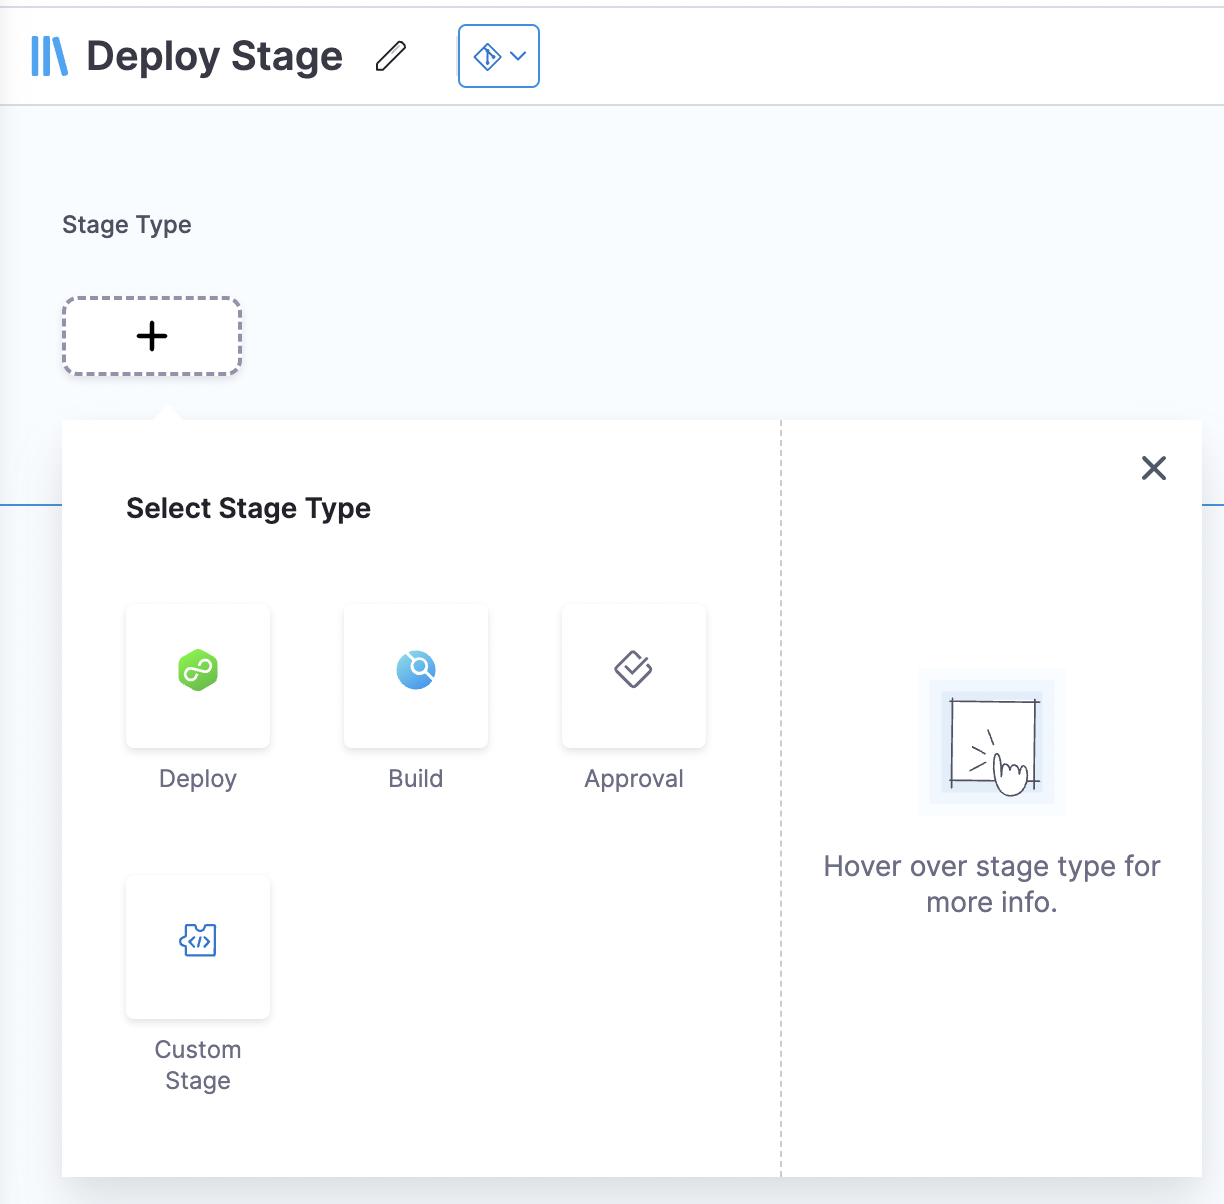
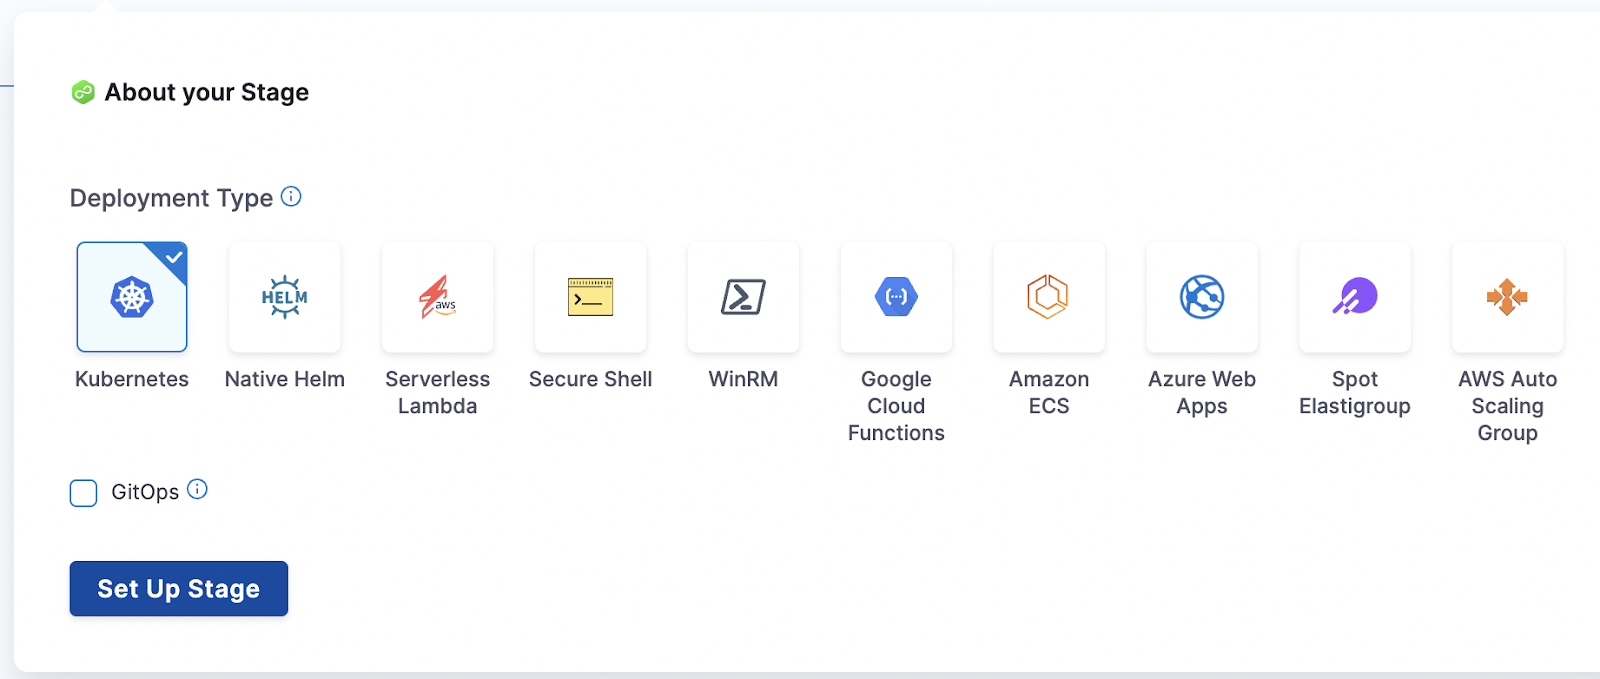
Pick the ‘Deploy’ stage and select the ‘Deployment Type’ in the next step.
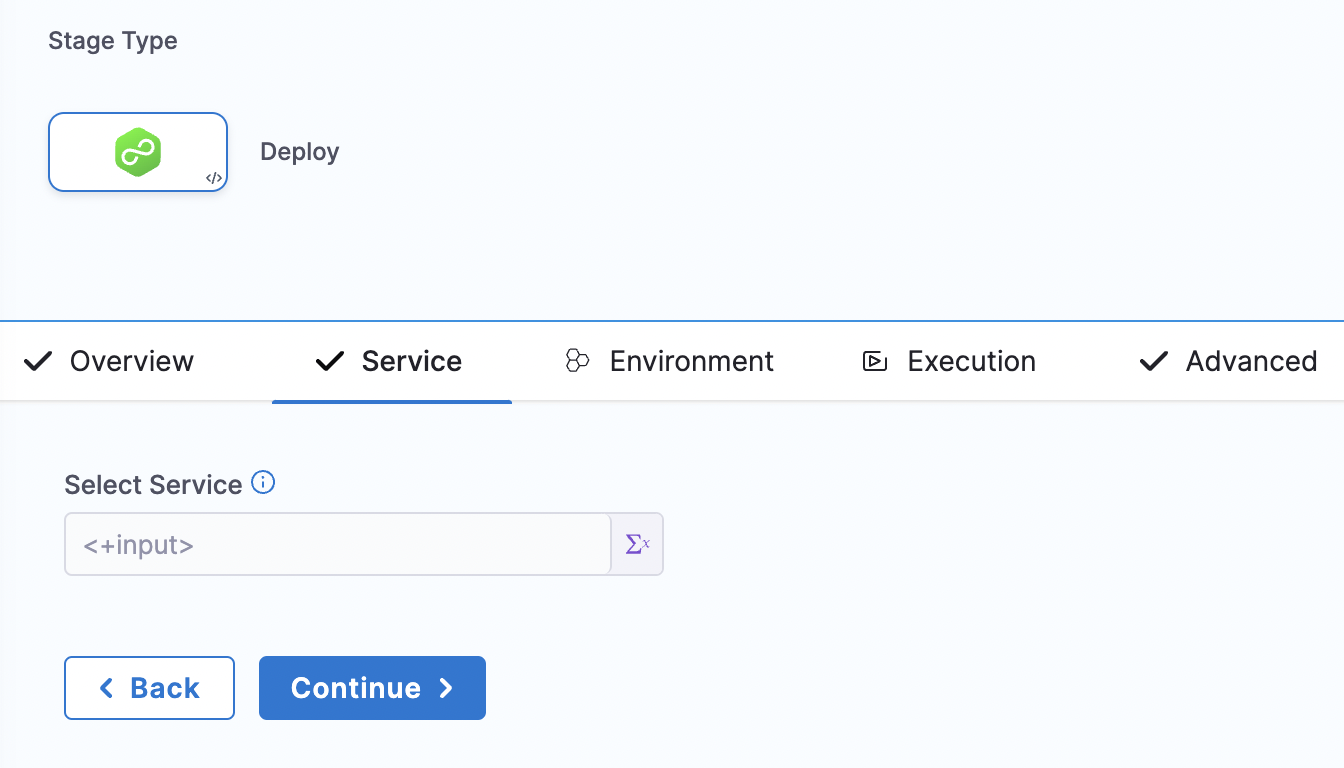
Select the run time input expression/value for ‘Service’ and ‘Environment’ and continue.
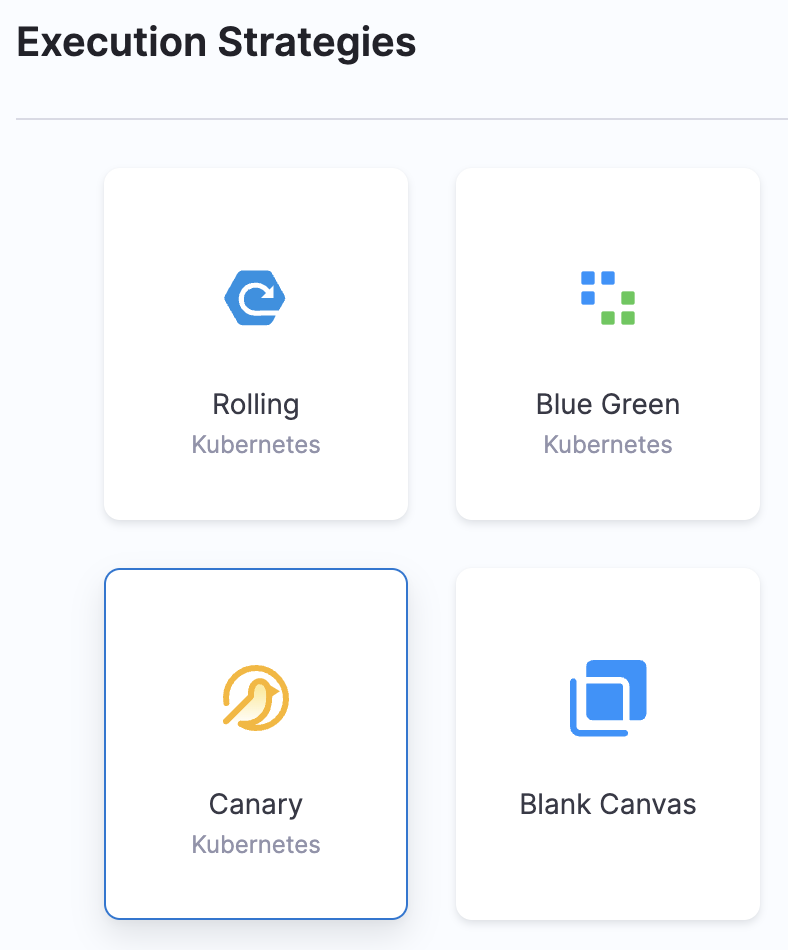
Select the deployment strategy.
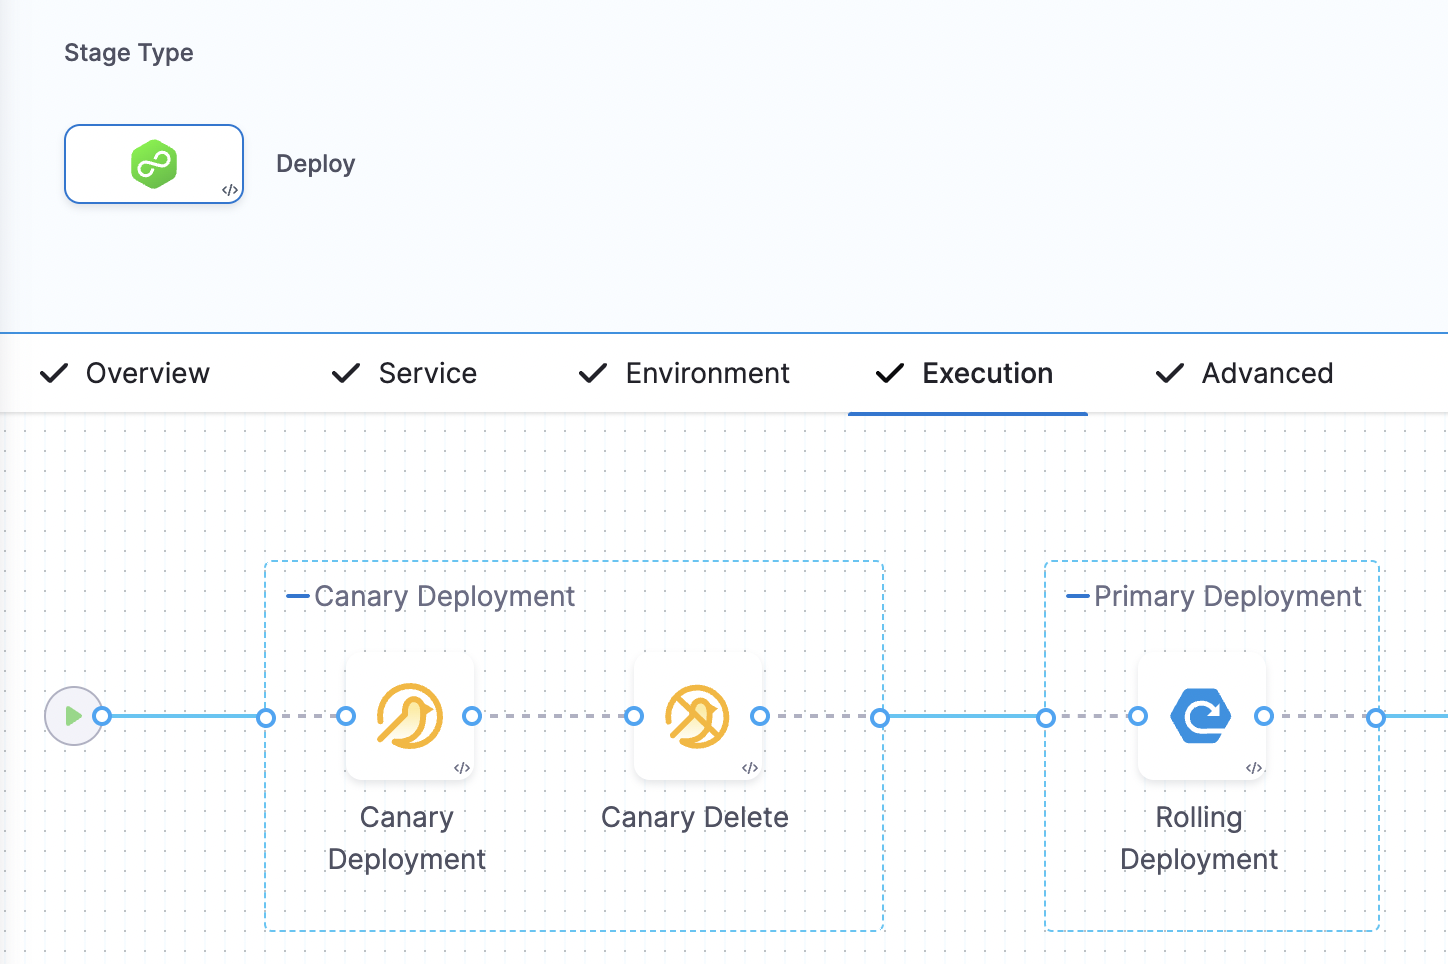
This is how our deploy stage pipeline looks now.
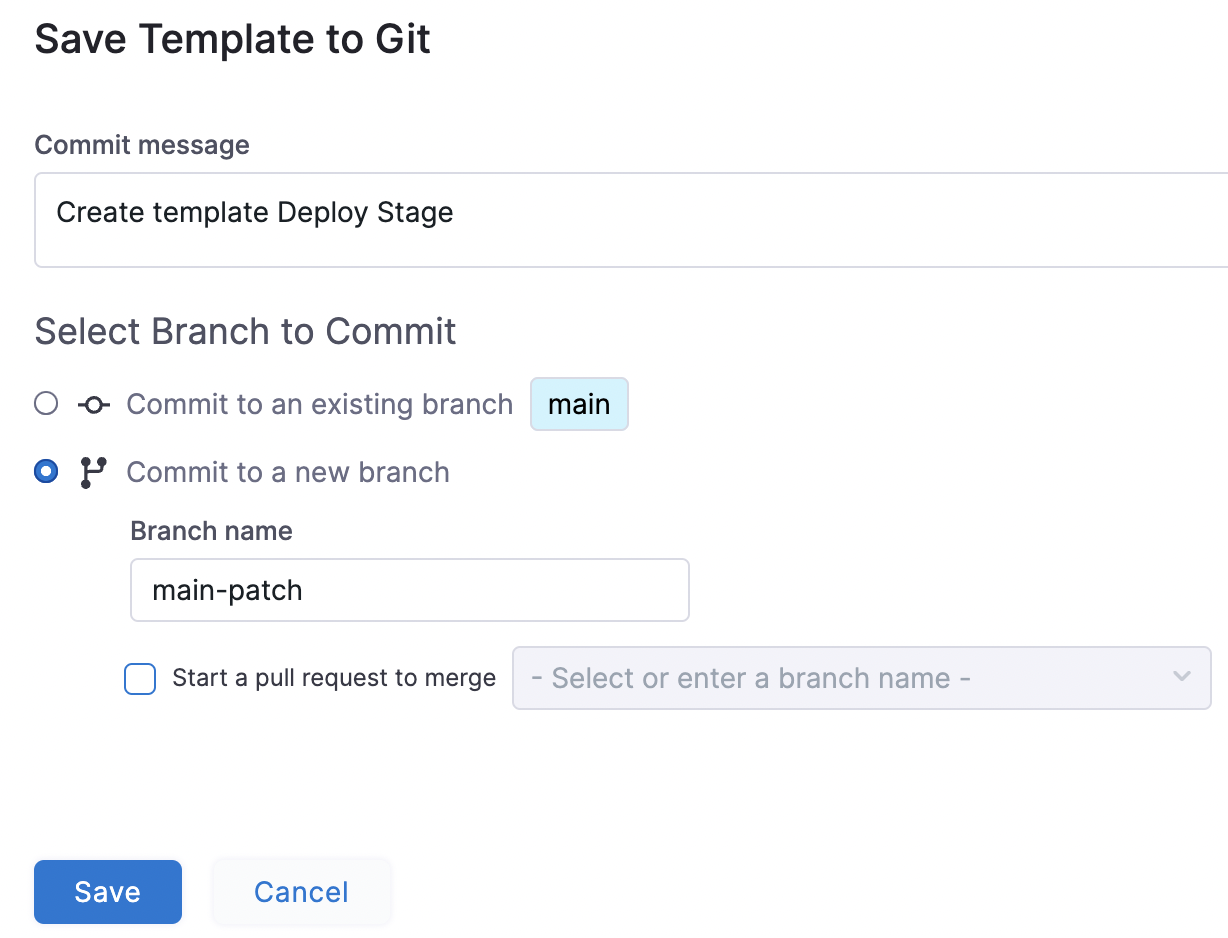
Save everything and select a branch on your repository to store your stage template.
Under Templates, you can now see your recently created Stage template.
Pipeline Template
The primary purpose of a Pipeline Template is to simplify and expedite the creation of pipelines by providing predefined configurations and parameters. Instead of building pipelines from scratch, users can leverage Pipeline Templates as a starting point. These templates already contain predefined stages, steps, and settings, along with built-in parameters that can be customized as per specific deployment requirements.
Click on ‘New Template’, and select `Pipeline` as the option.
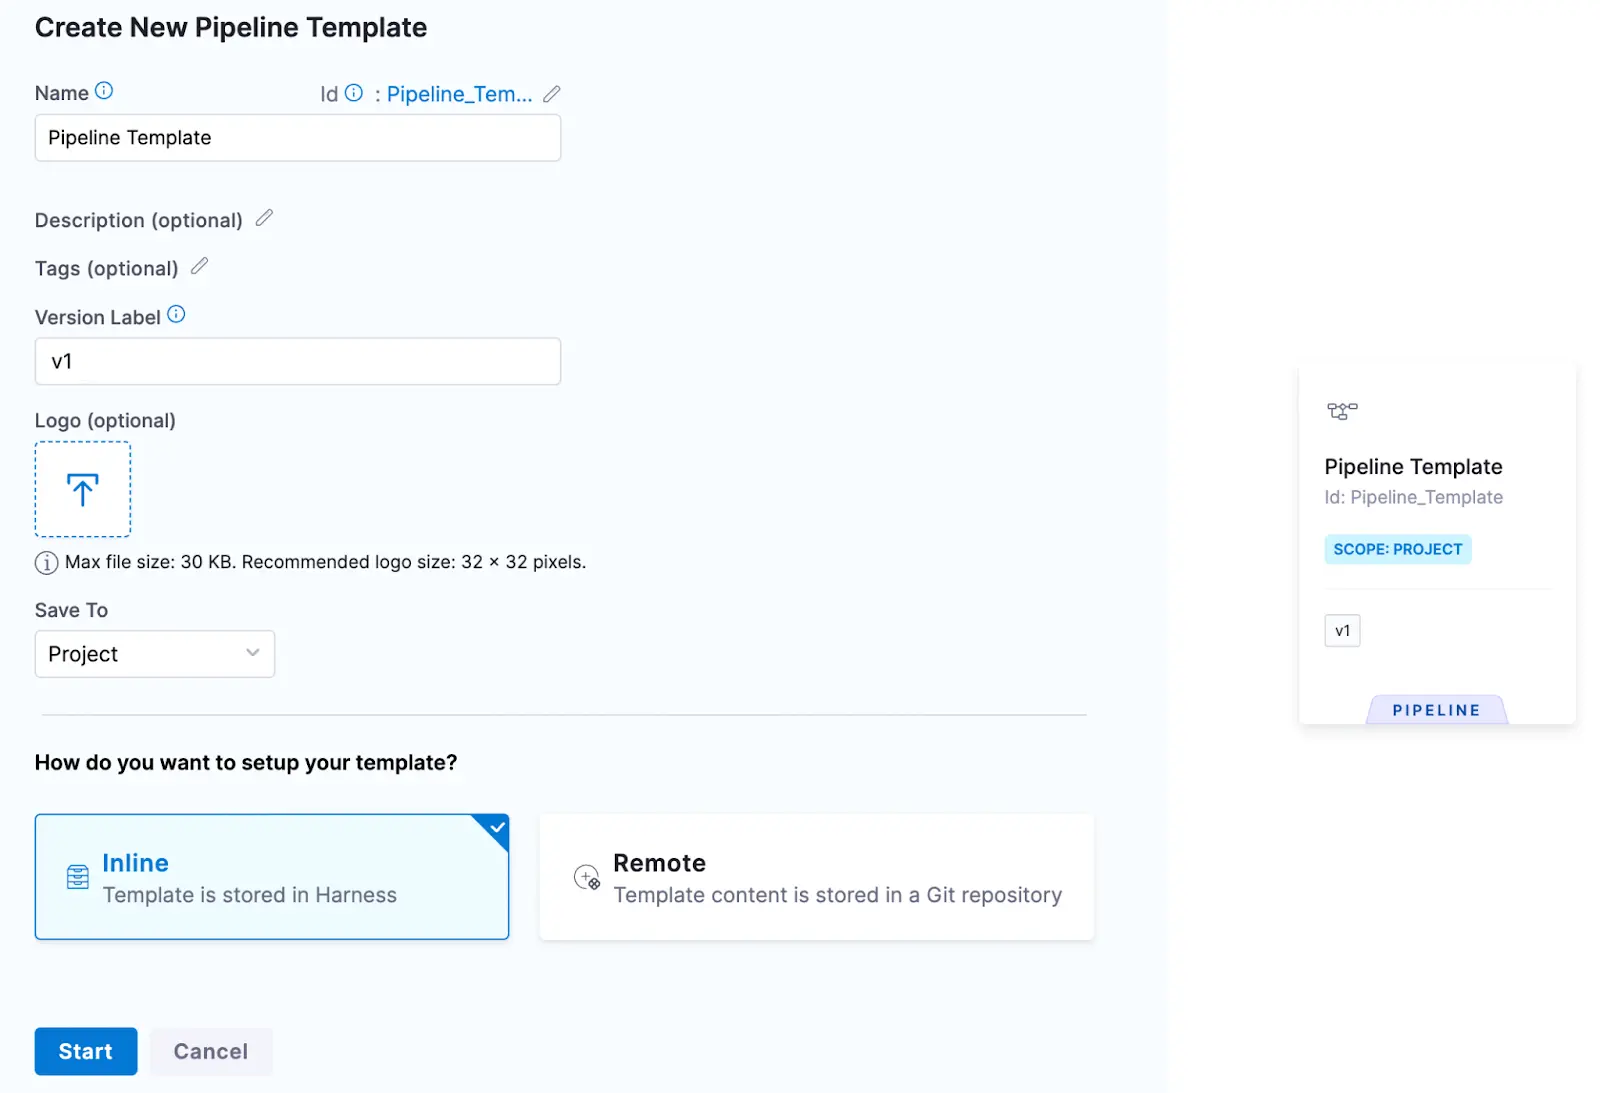
Click ‘Start’, and you will get to this pipeline dashboard to pick a stage.
Select the ‘Deploy’ stage.
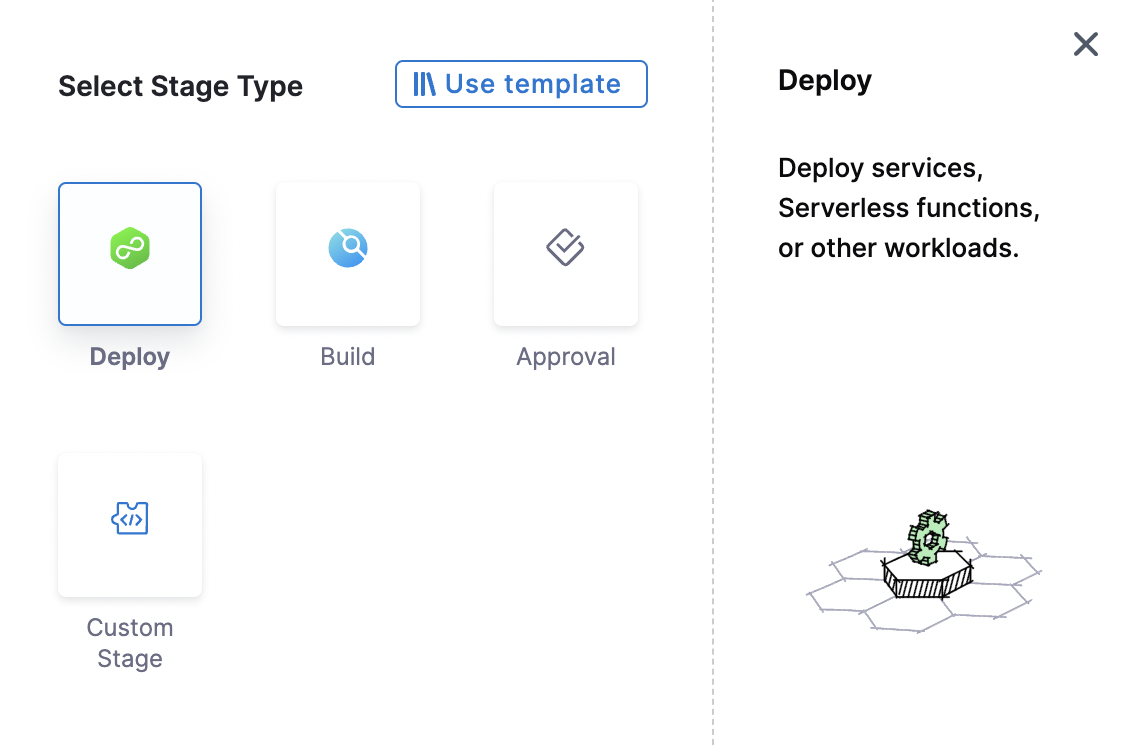
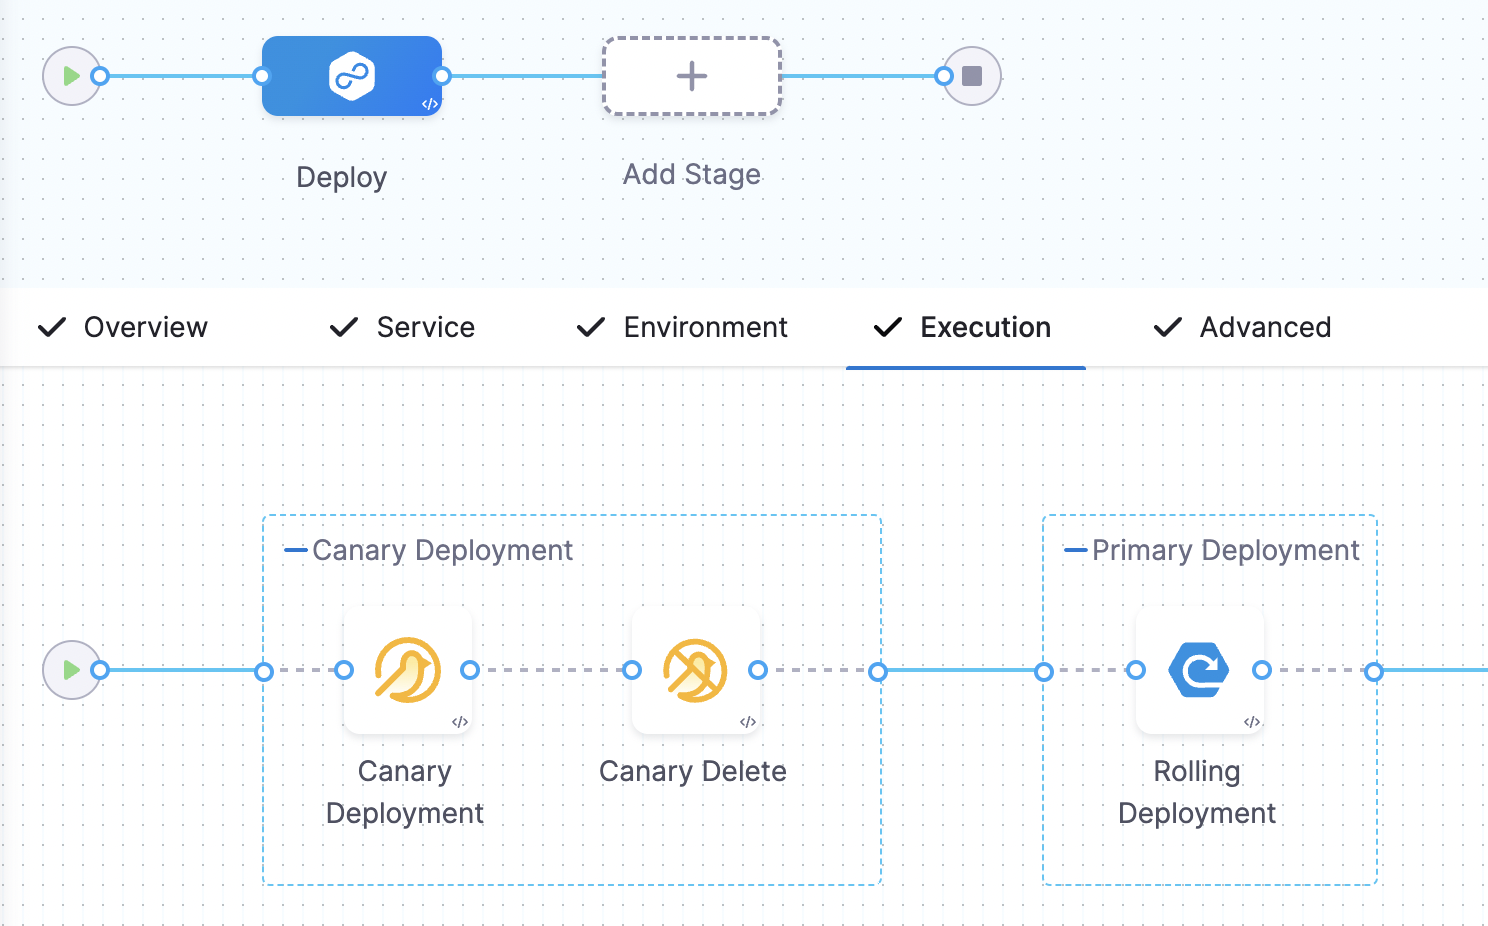
Add the required details to the stage. Just for example, let’s pick ‘Kubernetes’ as the Deployment Type. Add the Service, Environment, and Execution details. You can add fixed, runtime or expression values.
You can select your deployment strategy.
Finally, this is what your pipeline looks like, as shown below.
If you go to the templates under project set up, you should see our newly created pipeline template.
Harness Pipeline Templates in Action
Harness Pipeline Templates save a lot of your developers' time, so they don’t have to reinvent the wheel. Once set up, they are free to collaborate and work. Let us show you how to use these templates.
Create a new pipeline and add the details.
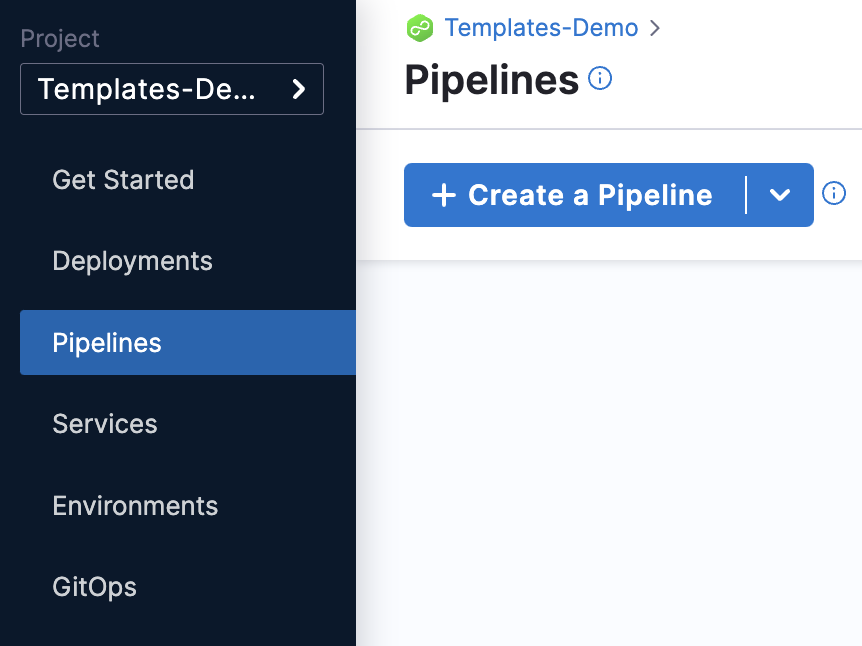
Select ‘Start with Template’ and continue.
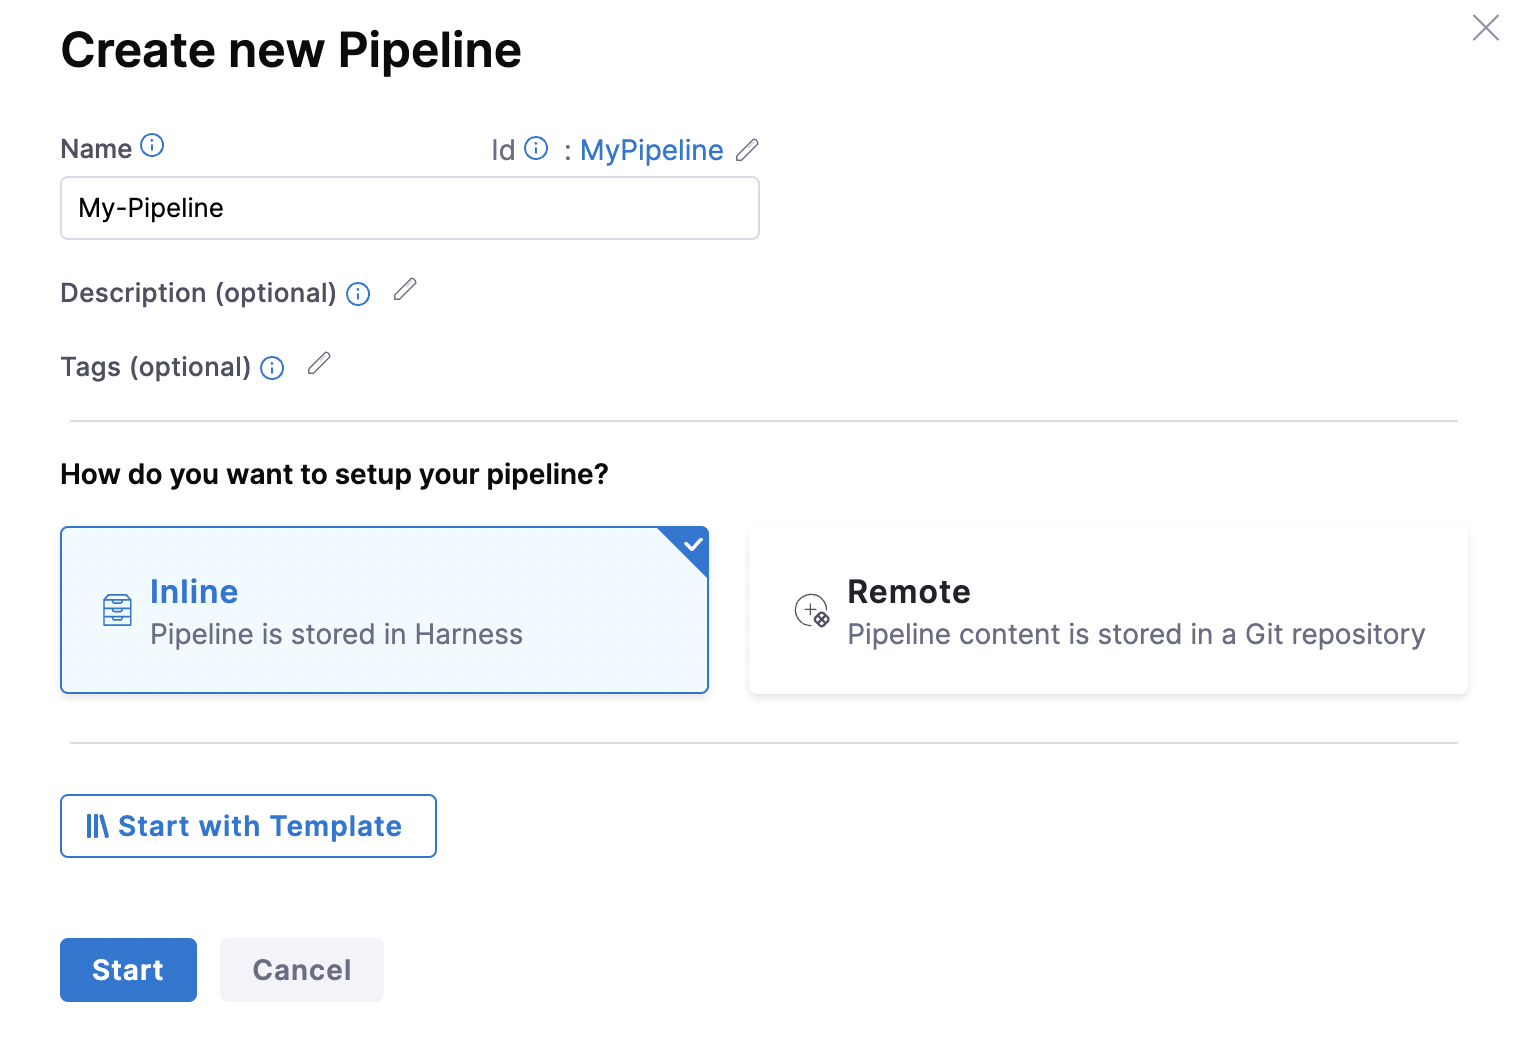
Once you click on ‘Start with Template’, you will be redirected to the Templates library, where you will see all your templates created.
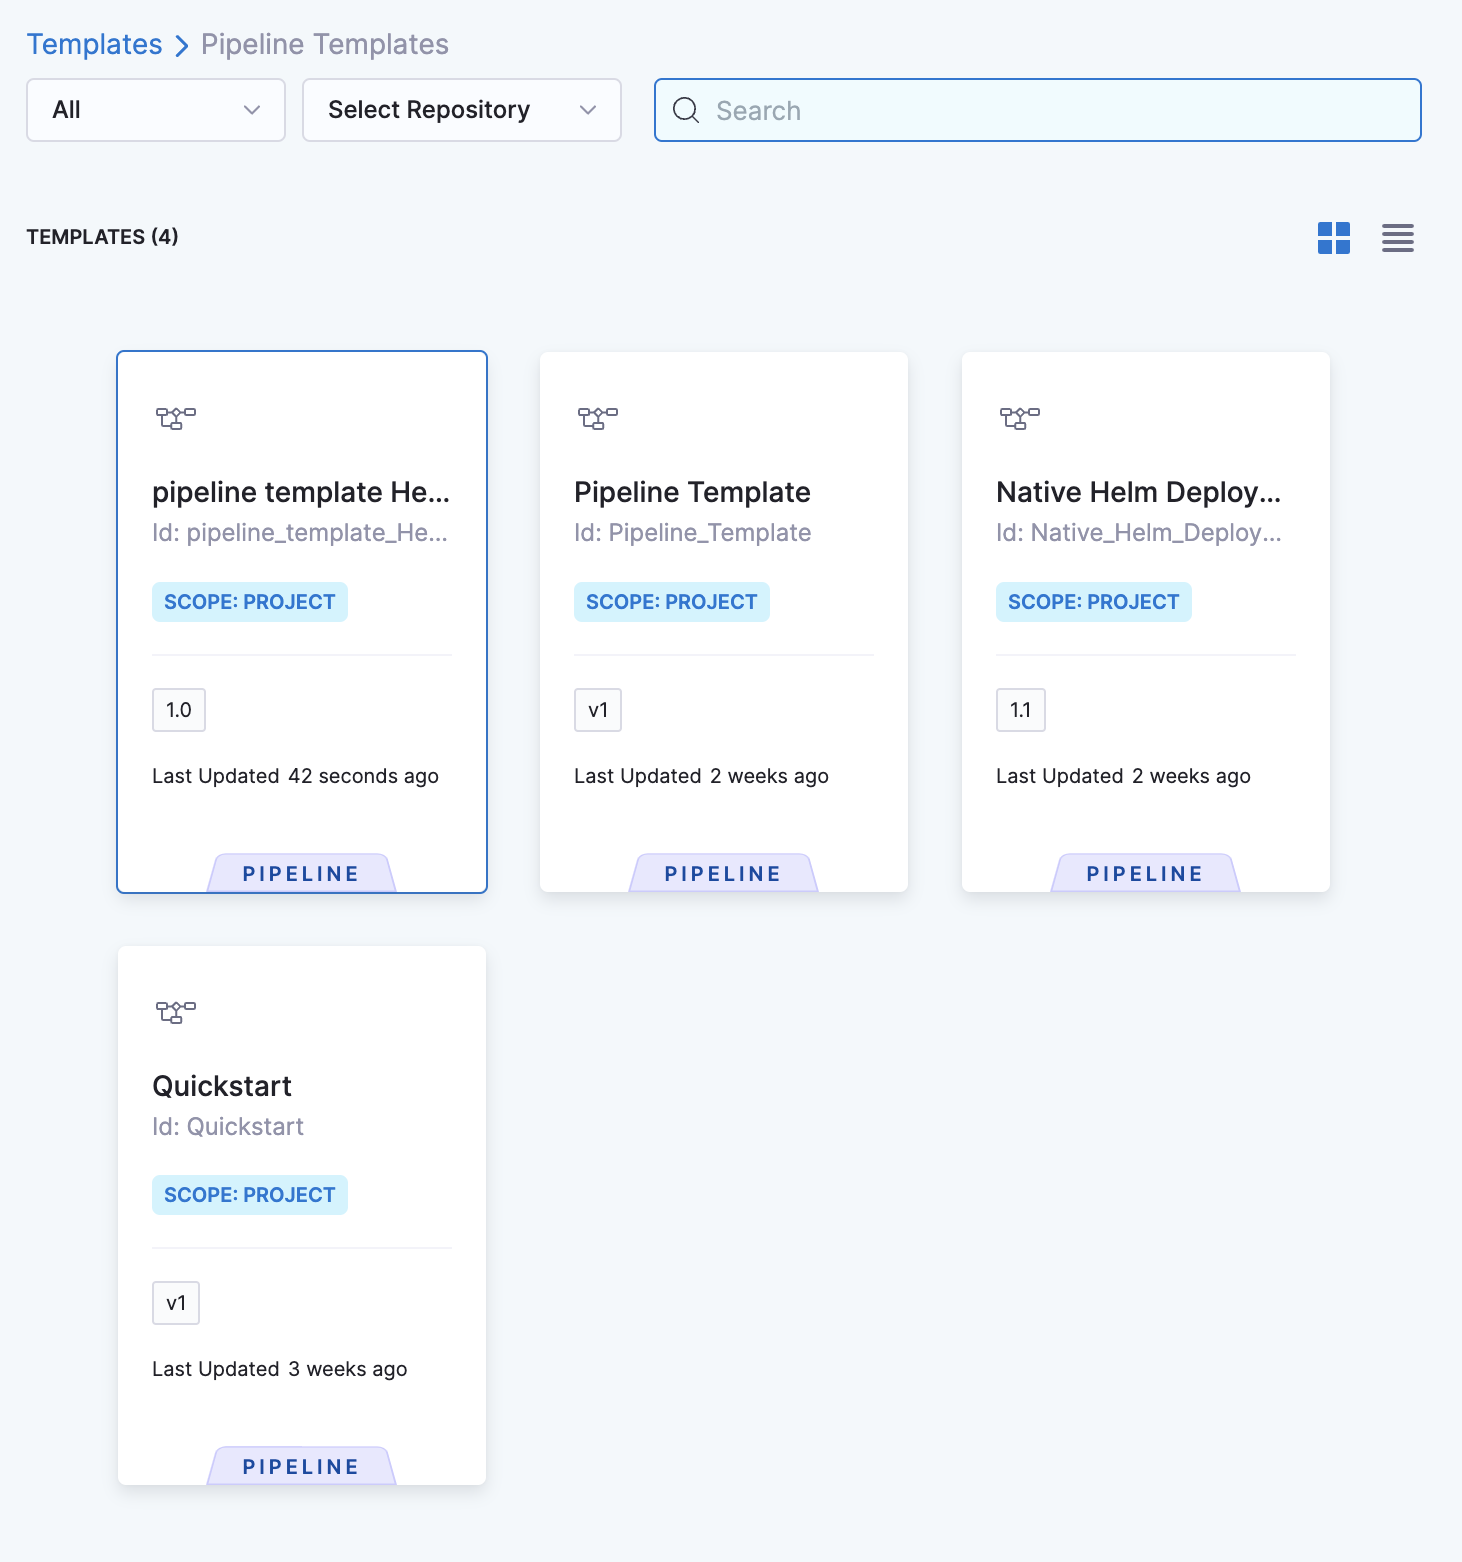
Click on the one that you would like to use. Let’s click on the first pipeline template shown in the list above.
You can see the details, activity log, template inputs, yaml and referenced by options.
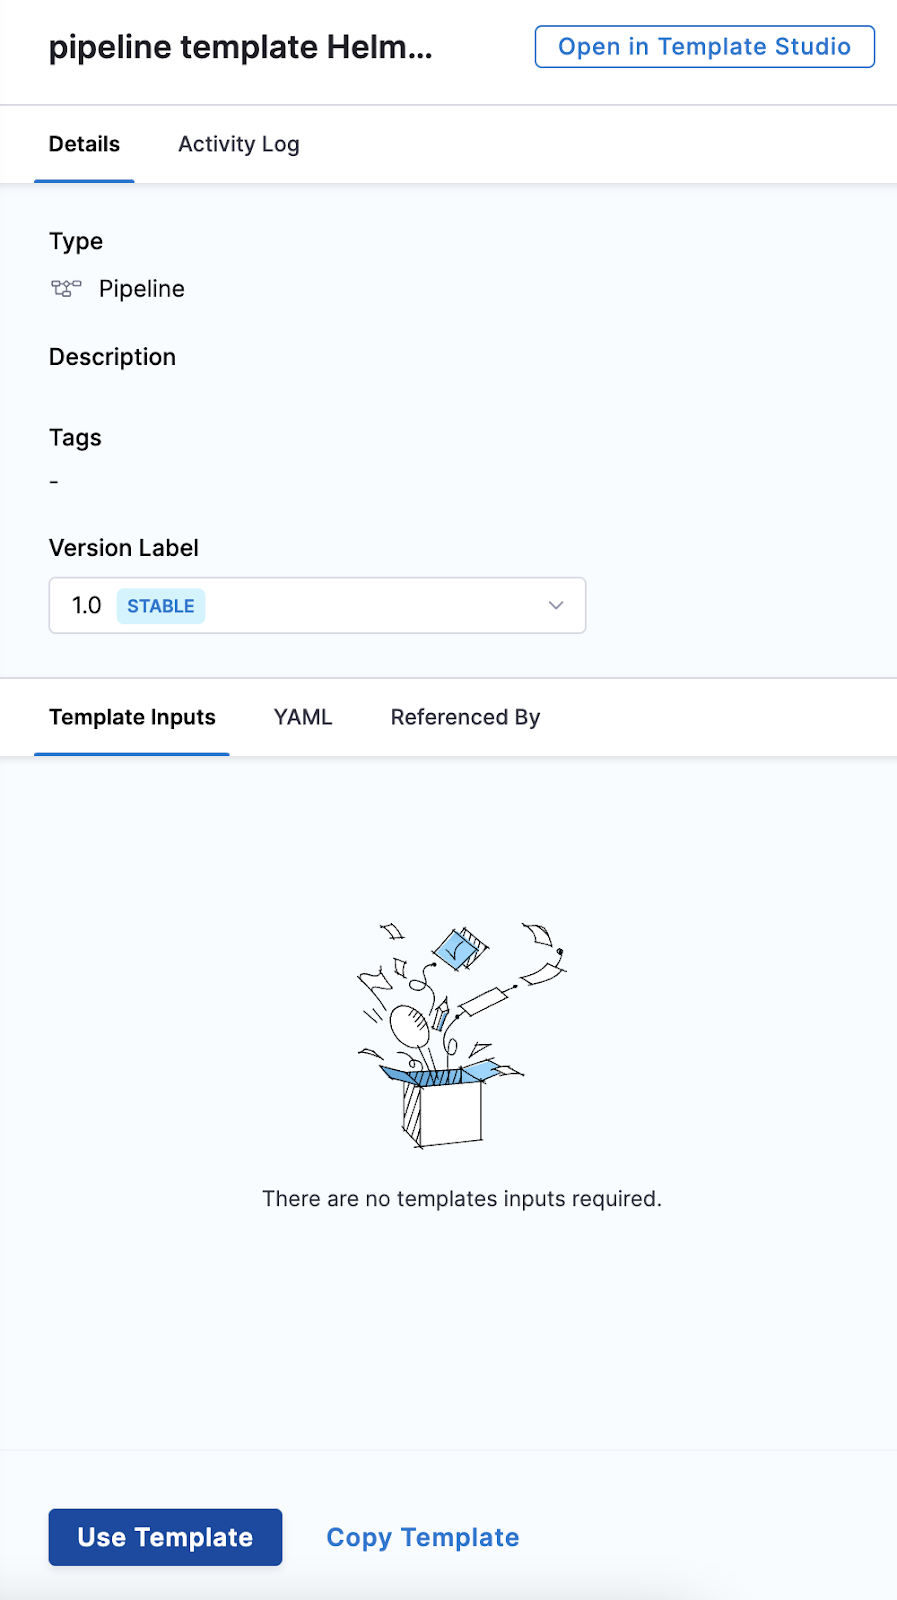
You can simply click on ‘Use Template’ to use this template.
This is what you should see.
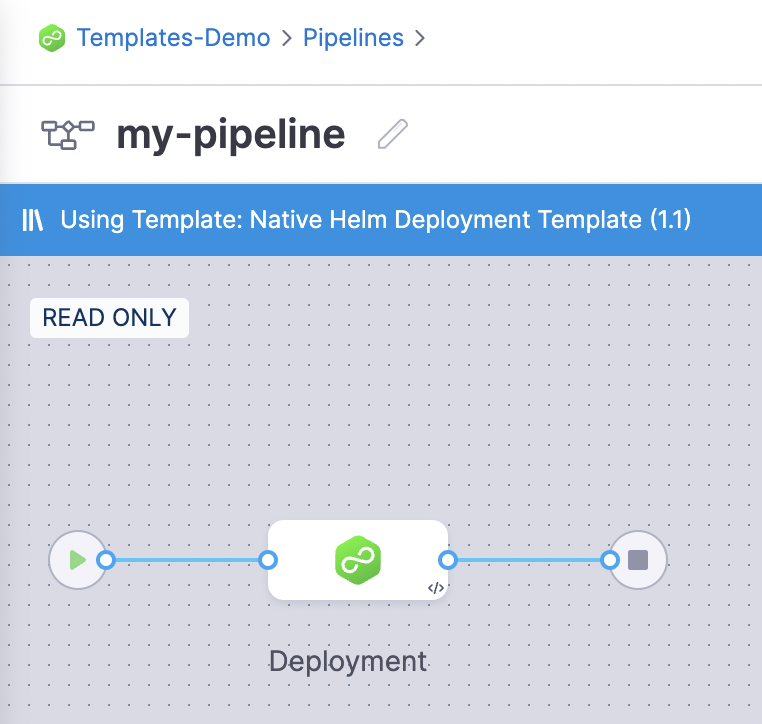
You can save and run the pipeline to deploy a new service.
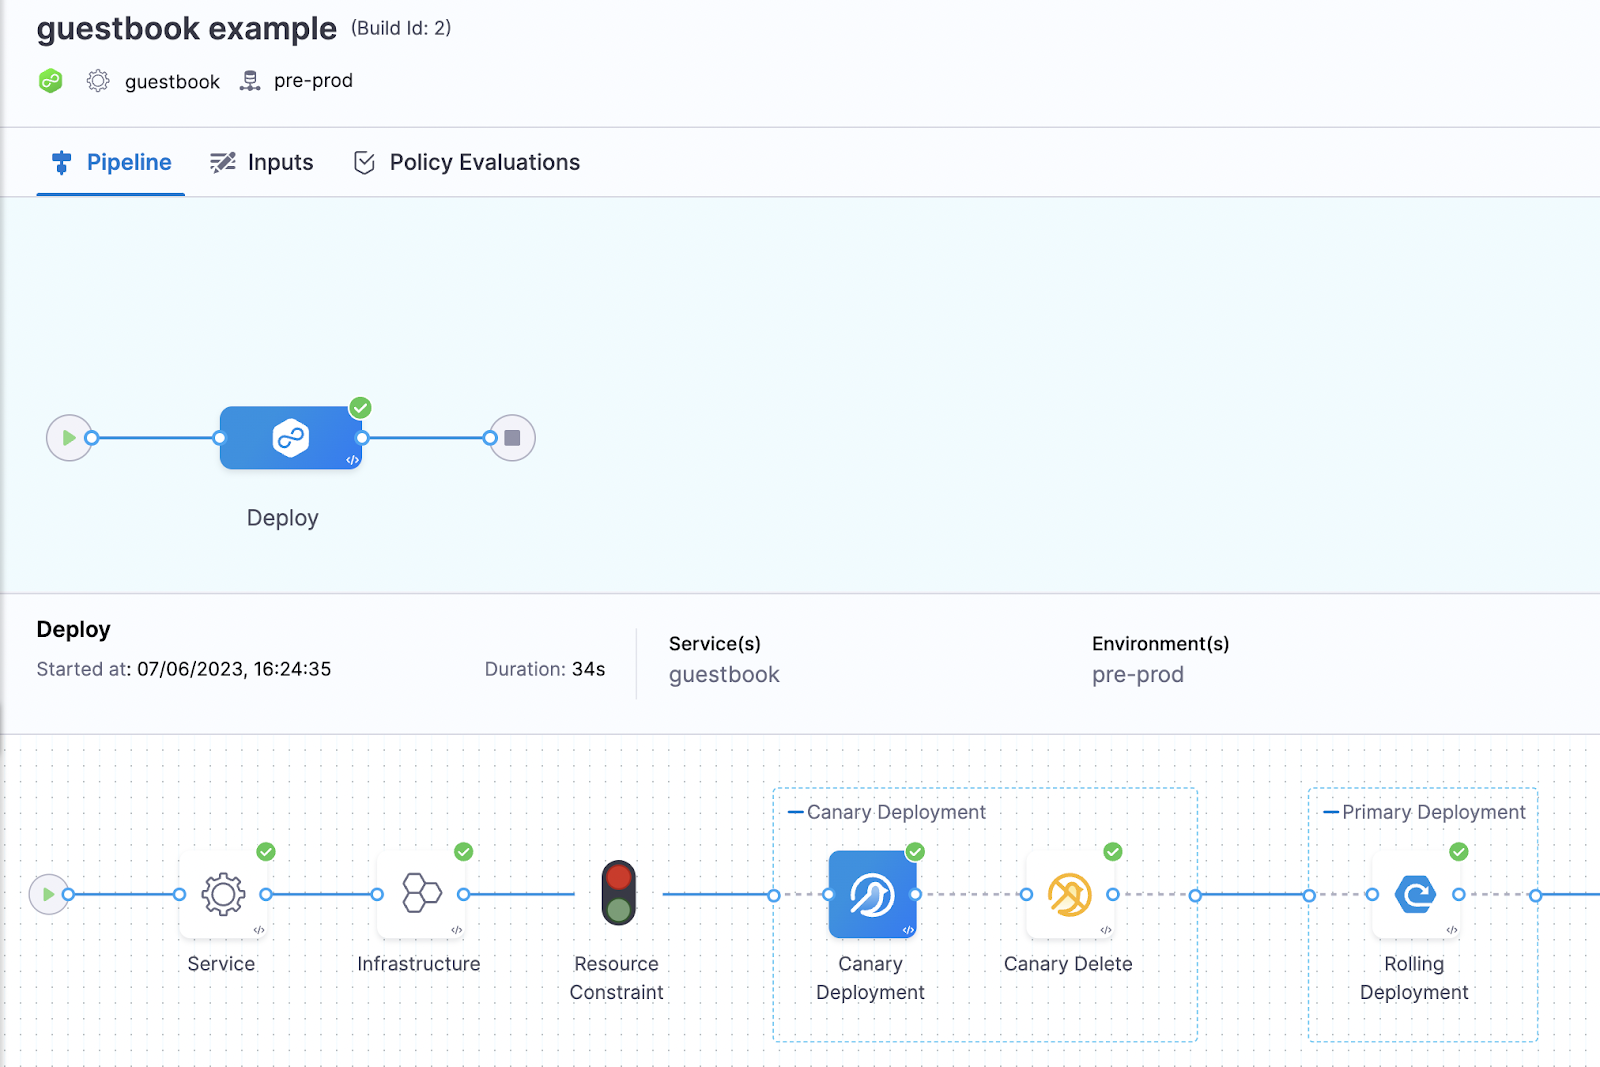
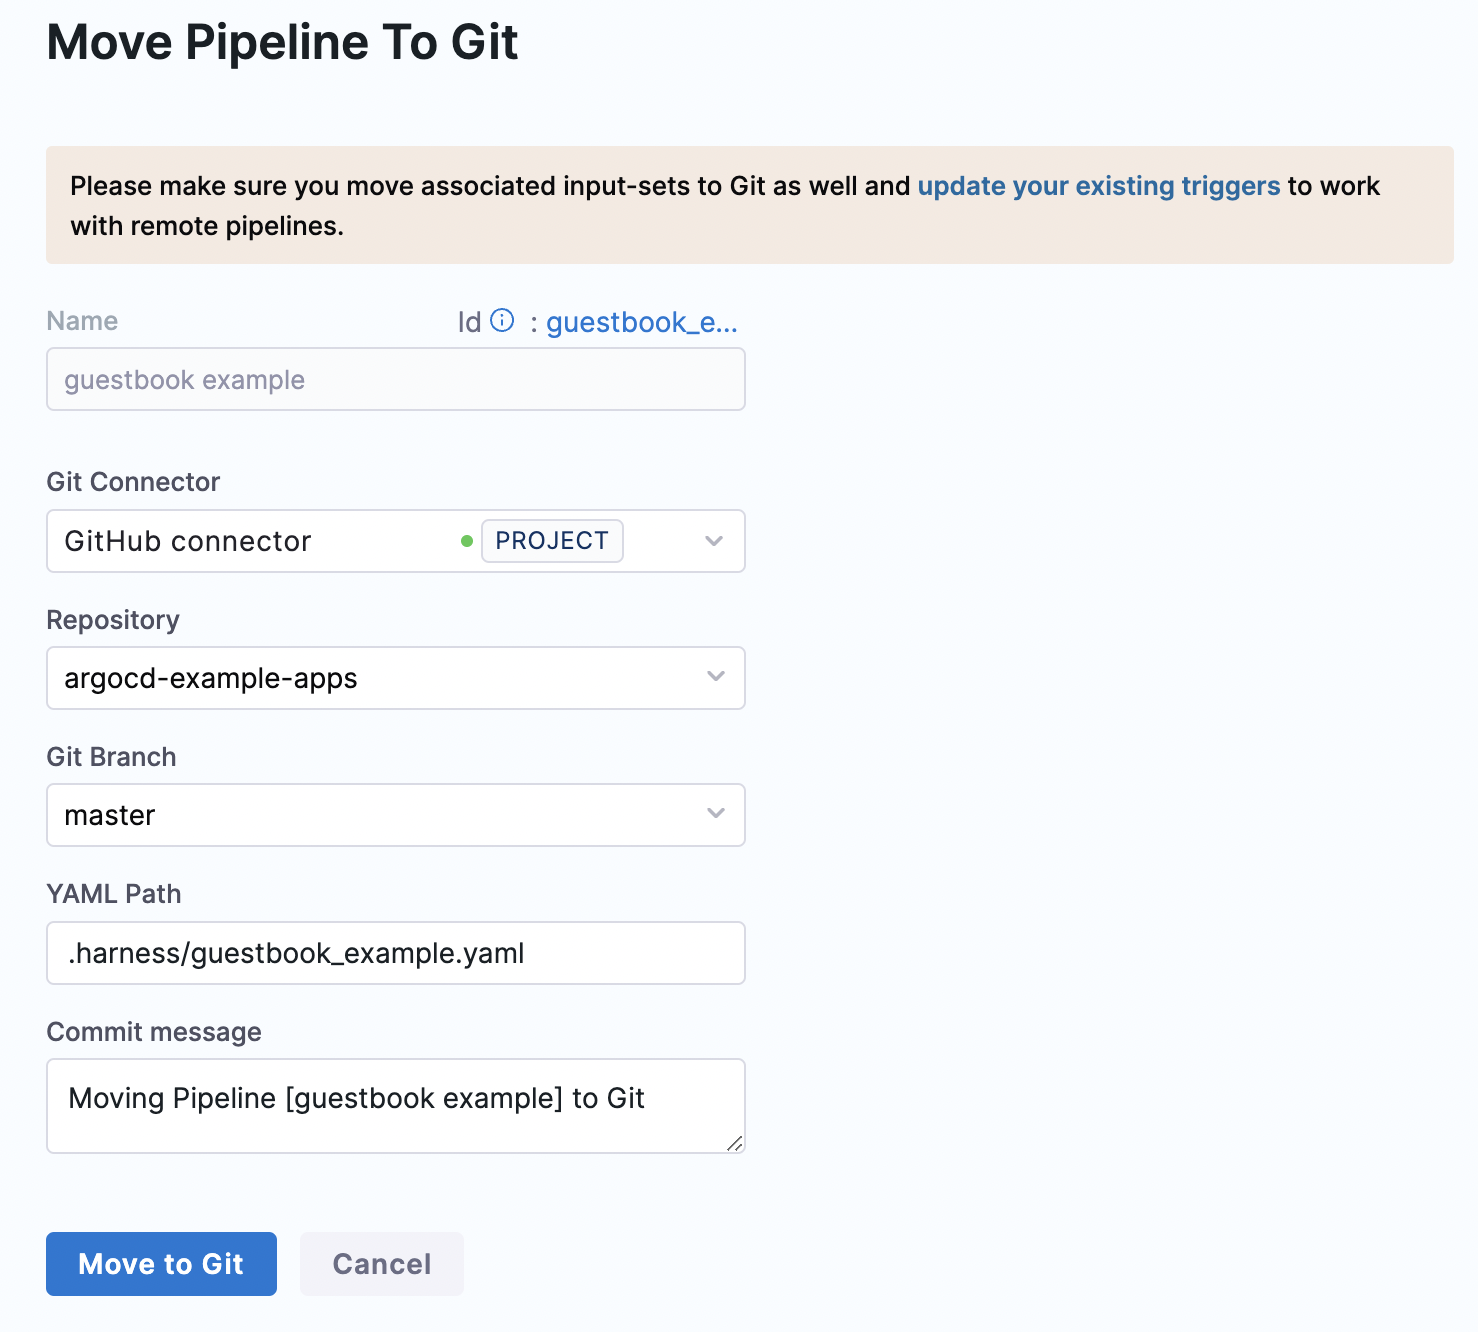
You can also push this templated pipeline to your GitHub repository.
You can see the pushed changes on your repository.
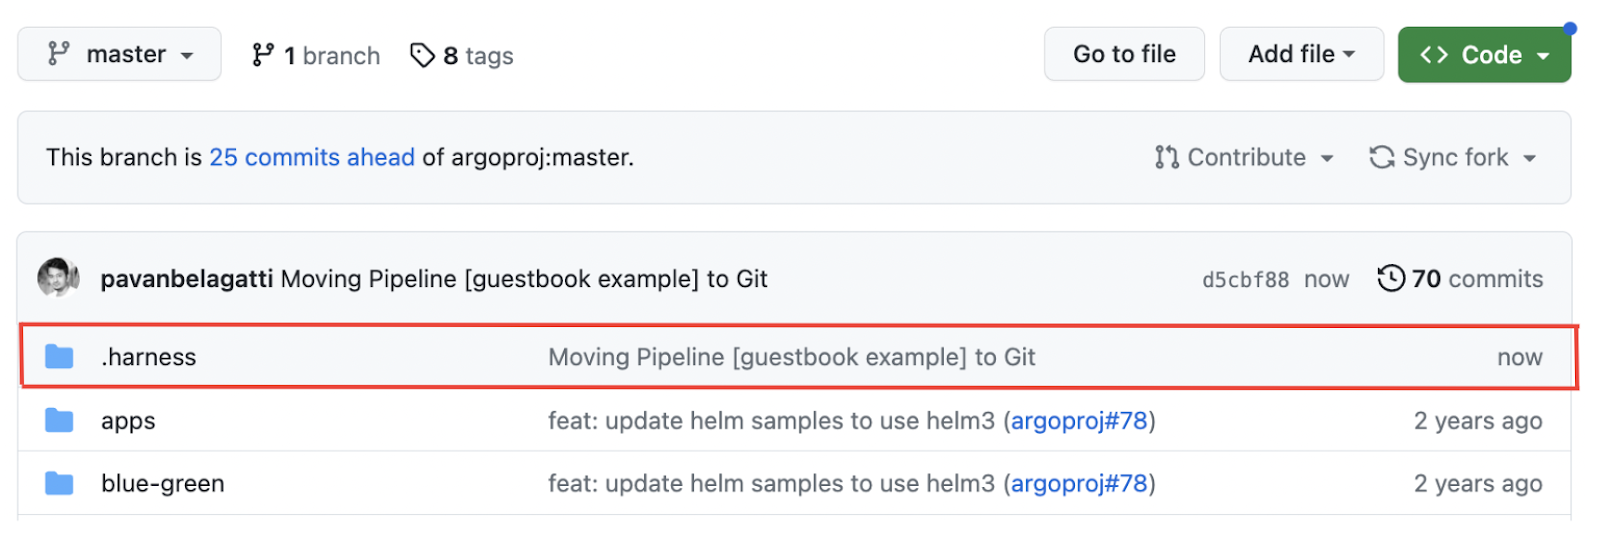
This way, you can have the smoothest Git experience also.
Comparing Pipeline Templates: Harness vs GitLab
- Ease of Use: Harness Templates involve a user-friendly interface, allowing users to define deployment workflows and configuration variables easily. On the other hand, GitLab templates use a YAML-based syntax, which can be more complex and require a deeper understanding.
- Built-in Intelligence: Harness templates come with built-in intelligence and automation capabilities. They suggest optimal deployment strategies, detect errors, and provide recommendations for improvements. These intelligent features help streamline the deployment process and improve overall efficiency. On the other hand, GitLab templates lack such built-in intelligence and automation, requiring users to rely more on manual configuration and troubleshooting.
- Advanced Pipeline Management: Harness templates offer comprehensive support for building and managing continuous delivery pipelines. They allow users to define complex deployment workflows with multiple stages, steps, environments, and conditions. Harness also integrates with various external tools and platforms, providing seamless integration throughout the CI/CD pipeline. While GitLab also provides CI/CD capabilities, the flexibility and advanced pipeline management features of Harness templates make them more suitable for complex and enterprise-scale deployments.
Pipeline Templates Best Practices and Guidelines
When working with Harness pipeline templates, you can follow several best practices and guidelines. These practices help ensure efficient and effective software delivery processes. Here are some recommendations:
- Standardize Pipeline Templates: Define a set of standardized pipeline templates that reflect your organization's common deployment patterns. These templates should capture the most common steps and stages required for software delivery.
- Modularize Pipeline Templates: Break down complex pipeline templates into modular components using step group templates. This allows for better reusability and maintainability. You can create separate templates for common tasks like building, testing, deploying, and monitoring.
- Version Control the Templates/Git Sync: Treat pipeline templates as code and store them in a version control system like Git as much as possible. This allows you to track changes and collaborate effectively.
- Proper Versioning: Follow proper versioning while creating templates at Harness. This allows developers and the team to identify the correct templates quickly and helps standardize the process across the department.
- Secrets Management: Avoid hardcoding sensitive information like API keys or passwords directly into pipeline templates. Instead, use Harness's secrets management capabilities or integrate with external secret management systems. This helps maintain security and reduces the risk of exposing sensitive information.
- Test and Validation: Test and validate your pipeline templates before deploying them in production. Leverage Harness's validation capabilities to catch errors or misconfigurations early in the development process.
- Documentation: Document your pipeline templates and provide clear instructions on how to use them. Include information about inputs, expected behavior, and any dependencies. This helps onboard new team members and ensures consistency across different projects.
- Continuous Improvement: Continuously evaluate and refine your pipeline templates. Regularly review metrics and feedback to identify areas for improvement, optimize performance, and streamline the software delivery process.
- Collaboration and Sharing: Foster collaboration within your organization by encouraging teams to share their pipeline templates and best practices. This promotes knowledge sharing, accelerates development, and reduces duplicated efforts.
- Training and Education: Invest in training and education to ensure teams understand how to use Harness pipeline templates effectively. This includes providing resources, workshops, and documentation to help teams maximize the benefits of the platform.
Following these best practices and guidelines can enhance your software delivery pipelines' efficiency, scalability, and reliability using Harness.
Conclusion
Harness templates provide various benefits and act accordingly with the DevOps principles of automation and deploying faster. These templates are a solid way to optimize your developers' time and can be used to onboard new teams faster. In addition, Reusing CI/CD templates fastens the software delivery process and help organizations reduce their overall DevOps cost. It is time to scrap your old and traditional methods of building a CI/CD pipeline from scratch and use Harness templates instead.
