Integrating Sonatype Nexus IQ with Harness Platform enables automated vulnerability scanning in the CI/CD pipeline, shifting left security to identify and mitigate risks early in the development process. This approach enhances application security by leveraging Nexus IQ's CLI for container scans, operationalized through Harness's workflow management for efficient and secure deployments.
There is a big push for shifting left when it comes to application security. The DevSecOps movement is about getting information into the hands of developers to make more hygienic choices. A crucial part of a DevSecOps pipeline is a vulnerability scan. If you are unfamiliar with a vulnerability scan, the main purpose is to match components with known vulnerabilities. As open-source proliferates the enterprise, engineers usually don’t have intimate knowledge of every component and sub-component [e.g transitive dependencies] that are included in their distributions.
The adage that software components age like milk not like wine is pretty true. Sonatype, a vendor in the DevSecOps space has its popular Nexus IQ platform which is used for vulnerability scanning. In this two-part example, we will be trying to deploy a purpose-built vulnerable container [OWASP’s Webgoat] into a Kubernetes cluster. We will leverage a few pieces getting Nexus IQ installed on a CentOS instance. Part one will focus on a basic integration and part two will focus on more operationalizing the integration.

Like always, you can follow along with the blog and/or video.
Sonatype Nexus IQ Setup
In this example, we will be running Sonatype Nexus IQ on an Amazon EC2 CentOS box. Going through Sonatype’s prerequisites, CentOS is fine running Open JDK 11 and Docker. Running these commands will install Open JDK 11, Docker Engine, download Nexus IQ, and install JQ for part two.
#Install JAVAsudo yum install java-11-openjdk#Install Docker#https://docs.docker.com/engine/install/centos/sudo yum install -y yum-utilssudo yum-config-manager \ --add-repo \ https://download.docker.com/linux/centos/docker-ce.repo sudo yum install docker-ce docker-ce-cli containerd.io sudo systemctl start docker#Install WGETsudo yum install wget#Install JQsudo yum -y install https://dl.fedoraproject.org/pub/epel/epel-release-latest-7.noarch.rpmsudo yum install jq#Install Nexus IQmkdir nexus-iq-servercd nexus-iq-serverwget -O nexus-iq-server.tar.gz https://download.sonatype.com/clm/server/latest.tar.gztar xfvz nexus-iq-server*.tar.gz

Once the tar.gz is expanded, run the demo.sh to quickly boot Nexus IQ server.

Nexus IQ by default serves traffic over port 8070. To access the web UI for the first time, you can head to your public_ip:8070. The default user/password is admin/admin123.

Once logged in, Nexus IQ is driven by Organizations. You can navigate to Orgs & Policies to see that structure. By default, there is a Root and Sandbox Organization. You can rename the Sandbox Organization and underlying Application to something more relatable by selecting Actions -> Edit App Name.

One additional step would be to rename the internal Application ID. Similar to renaming the Application Name, Actions -> Change App ID.

Once you hit Change, the Application ID will be something more logical.

With the basic Nexus IQ configuration out of the way, the next step is to get started on the Harness Platform.
Harness Platform Setup
If this is your first time leveraging the Harness Platform, the first step would be to install a Harness Delegate. The first delegate we will install is to easily interact and deploy with the Kubernetes cluster.
Setup -> Harness Delegates -> Install Delegate with type of Kubernetes YAML.

Download the tar.gz and expand the contents.

Inside the expanded folder, there will be a readme file with the kubectl command needed to install, which is kubectl apply -f harness-delegate.yaml. Run the kubectl apply command.

In a few moments, the Kubernetes Delegate will be available via the Harness UI.

With the Kubernetes Delegate up and running, we can also install a Harness SSH Delegate so we can run needed Sonatype Nexus CLI commands.
Back on your CentOS instance, make a new folder for the Harness Delegate and CD into the folder.
#Folder for SSH Delegatemkdir harness-delegatecd harness-delegate.

Back on the Harness Platform, we can get the SSH download link.
Setup -> Harness Delegates -> Install Delegate with Download Type Shell Script.

Click Copy Download Link and paste into the terminal. The cURL command will download a tar.gz of the Delegate. Expand the tar.gz and run the start.sh command.
#Install SSH Delegatetar xfvz harness*.tar.gzcd harness-delegate./start.sh

In a few moments, you will have a pair of Harness Delegates in the UI. One for Shell and one for Kubernetes.

With both Delegates up and running we have a wide paintbrush on how to architect the scan. One approach is using Nexus IQ’s CLI [command-line-interface] for a container scan and we can directly interact with that.
Sonatype Nexus IQ CLI
There are several ways to run a container scan with Nexus IQ. One of the easiest ways is to leverage the Nexus IQ CLI. Depending on the distribution you get from Sonatype, the CLI could ship with the Nexus IQ download.
An easy way to interact with your CentOS instance with Harness and ensuring software is in place is with a Harness Delegate Profile.
Setup -> Harness Delegates -> Delegate Profiles -> Add Delegate Profiles

Create a new Profile to Install Nexus IQ CLI.
#Install Nexus CLImkdir ~/nexus-clicd ~/nexus-cliwget -q -O nexus-iq-cli.jar https://download.sonatype.com/clm/scanner/latest.jar

Click Submit. Then, run the Delegate Profile by heading back to the Delegate UI and selecting the “Install Nexus IQ CLI” as the Profile.

In a few moments, the Delegate will install the Nexus IQ CLI. You can validate on the CentOS instance also.

With the Nexus CLI available, the next step will take us back to Harness.
Harness Pipeline Setup
To start creating a Harness Pipeline, Harness leverages an abstraction model called the CD Abstraction Model. The first piece would be to wire your Kubernetes cluster to Harness.
Setup -> Cloud Providers + Add Cloud Provider. Type is Kubernetes Cluster.

Since you have a running Harness Delegate inside your Kubernetes cluster, the easiest way to wire the cluster is to just inherit the details from the Delegate. Select the Delegate Name which represents your Kubernetes Delegate, click Test, Next, Submit.

Once the Cloud Provider is wired, The heart of your Pipeline is the Harness Application.
Setup -> Applications + Add Application

Once you hit Submit, time to start filling out the abstraction pieces.

The first abstraction piece would be letting Harness know where to deploy with a Harness Environment.
Setup -> Webgoat -> Environments + Add Environment

Once inside the Environment, can add a target piece of infrastructure with an Infrastructure Definition.
Setup -> Webgoat -> Environments -> WebGoat Farm + Add Infrastructure Defination.
Cloud Provider Type: Kubernetes Cluster
Deployment Type: Kubernetes
Cloud Provider: Webgoat K8s Cluster

Once you hit Submit, you will be wired up to deploy to the Kubernetes cluster.

The next item would be to define a Harness Service or what you will be deploying.
Setup -> Webgoat -> Services + Add Service with Deployment Type Kubernetes.

Once you hit Submit, can add the Webgoat Docker Image as an Artifact Source from a Docker Registry.

Harness ships with a pre-wire to public Docker Hub [Source Server Harness Docker Hub].The Docker Pull command for Webgoat is webgoat/webgoat-8.0 and that will be used for the Docker Image Name.

Once you hit Submit, all of the scaffolding for a Kubernetes deployment is generated for you by the Harness Platform.

With the artifact out of the way, there are a few ways to programmatically call Nexus IQ from Harness.
Calling Nexus IQ from Harness
The approach that the example will take have the Harness SSH Delegate invoke the Nexus IQ CLI on the CentOS instance.
To get started, the first step is to label the Harness Delegate with a Custom Selector.
Setup -> Harness Delegates -> Your SSH Delegate + Custom Selector. Name the Selector “NexusIQScan”.

Once you hit submit, the Selector will be available.
The next step would be to prepare the CD Abstraction Model with another Cloud Provider representing where Nexus IQ is installed. The rationale behind this would allow the Nexus IQ steps to be part of a managed Workflow in Harness.
Setup -> Cloud Providers -> + Add Cloud Provider. The type is Physical Data Center. Name the Provider “Nexus IQ DC”.

Once you hit Submit, the Nexus IQ DC will appear.

Back in the Webgoat Harness Application, you can now create a Harness Environment that maps back to the CentOS instance.
Setup -> Webgoat -> Environments + Add Environment. Can name the Environment “Nexus IQ Server”.

Next, you will need to create the Infrastructure Definition inside the Environment. Since we already have a Harness Delegate running in the CentOS instance and created a Custom Selector to select that particular Delegate, the Hostname can be localhost.
Name: Nexus IQ CentOSHostName(s): localhost
Connection Attribute: Any

Once you hit Submit, the Infrastructure Definition will be out of the way.
The Harness Platform can orchestrate and manage multiple types of deployments as Harness Workflows. These are driven off of the Harness Service. Earlier you wired the Webgoat Docker Image as a Harness Service. We can create a generic Shell Service to call the CLI.
Setup -> Webgoat -> Services + Add Service.
Name: Nexus IQ Shell
Deployment Type: Secure Shell (SSH)
Artifact Type: Other

Once you hit Submit, you will see the scaffolding there for the SSH Deployment.

To have Harness manage the commands needed to execute a Nexus IQ CLI scan, can create a Harness Workflow representing that.
Setup -> Webgoat -> Workflows + Add Workflow
Name: Scan Artifact
Workflow Type: Rolling Deployment
Environment: Nexus IQ Server
Service: Nexus IQ Shell
Infrastructure Definition: Nexus IQ CentOS

Once you hit Submit, a templated Workflow will be generated. The phases, names, and order can be changed, condensed, etc.

Slot in the CLI Call under Step 3 “Deploy Service” by clicking + Add Step.
In the Add Step UI, search for “Shell” and select Shell Script.

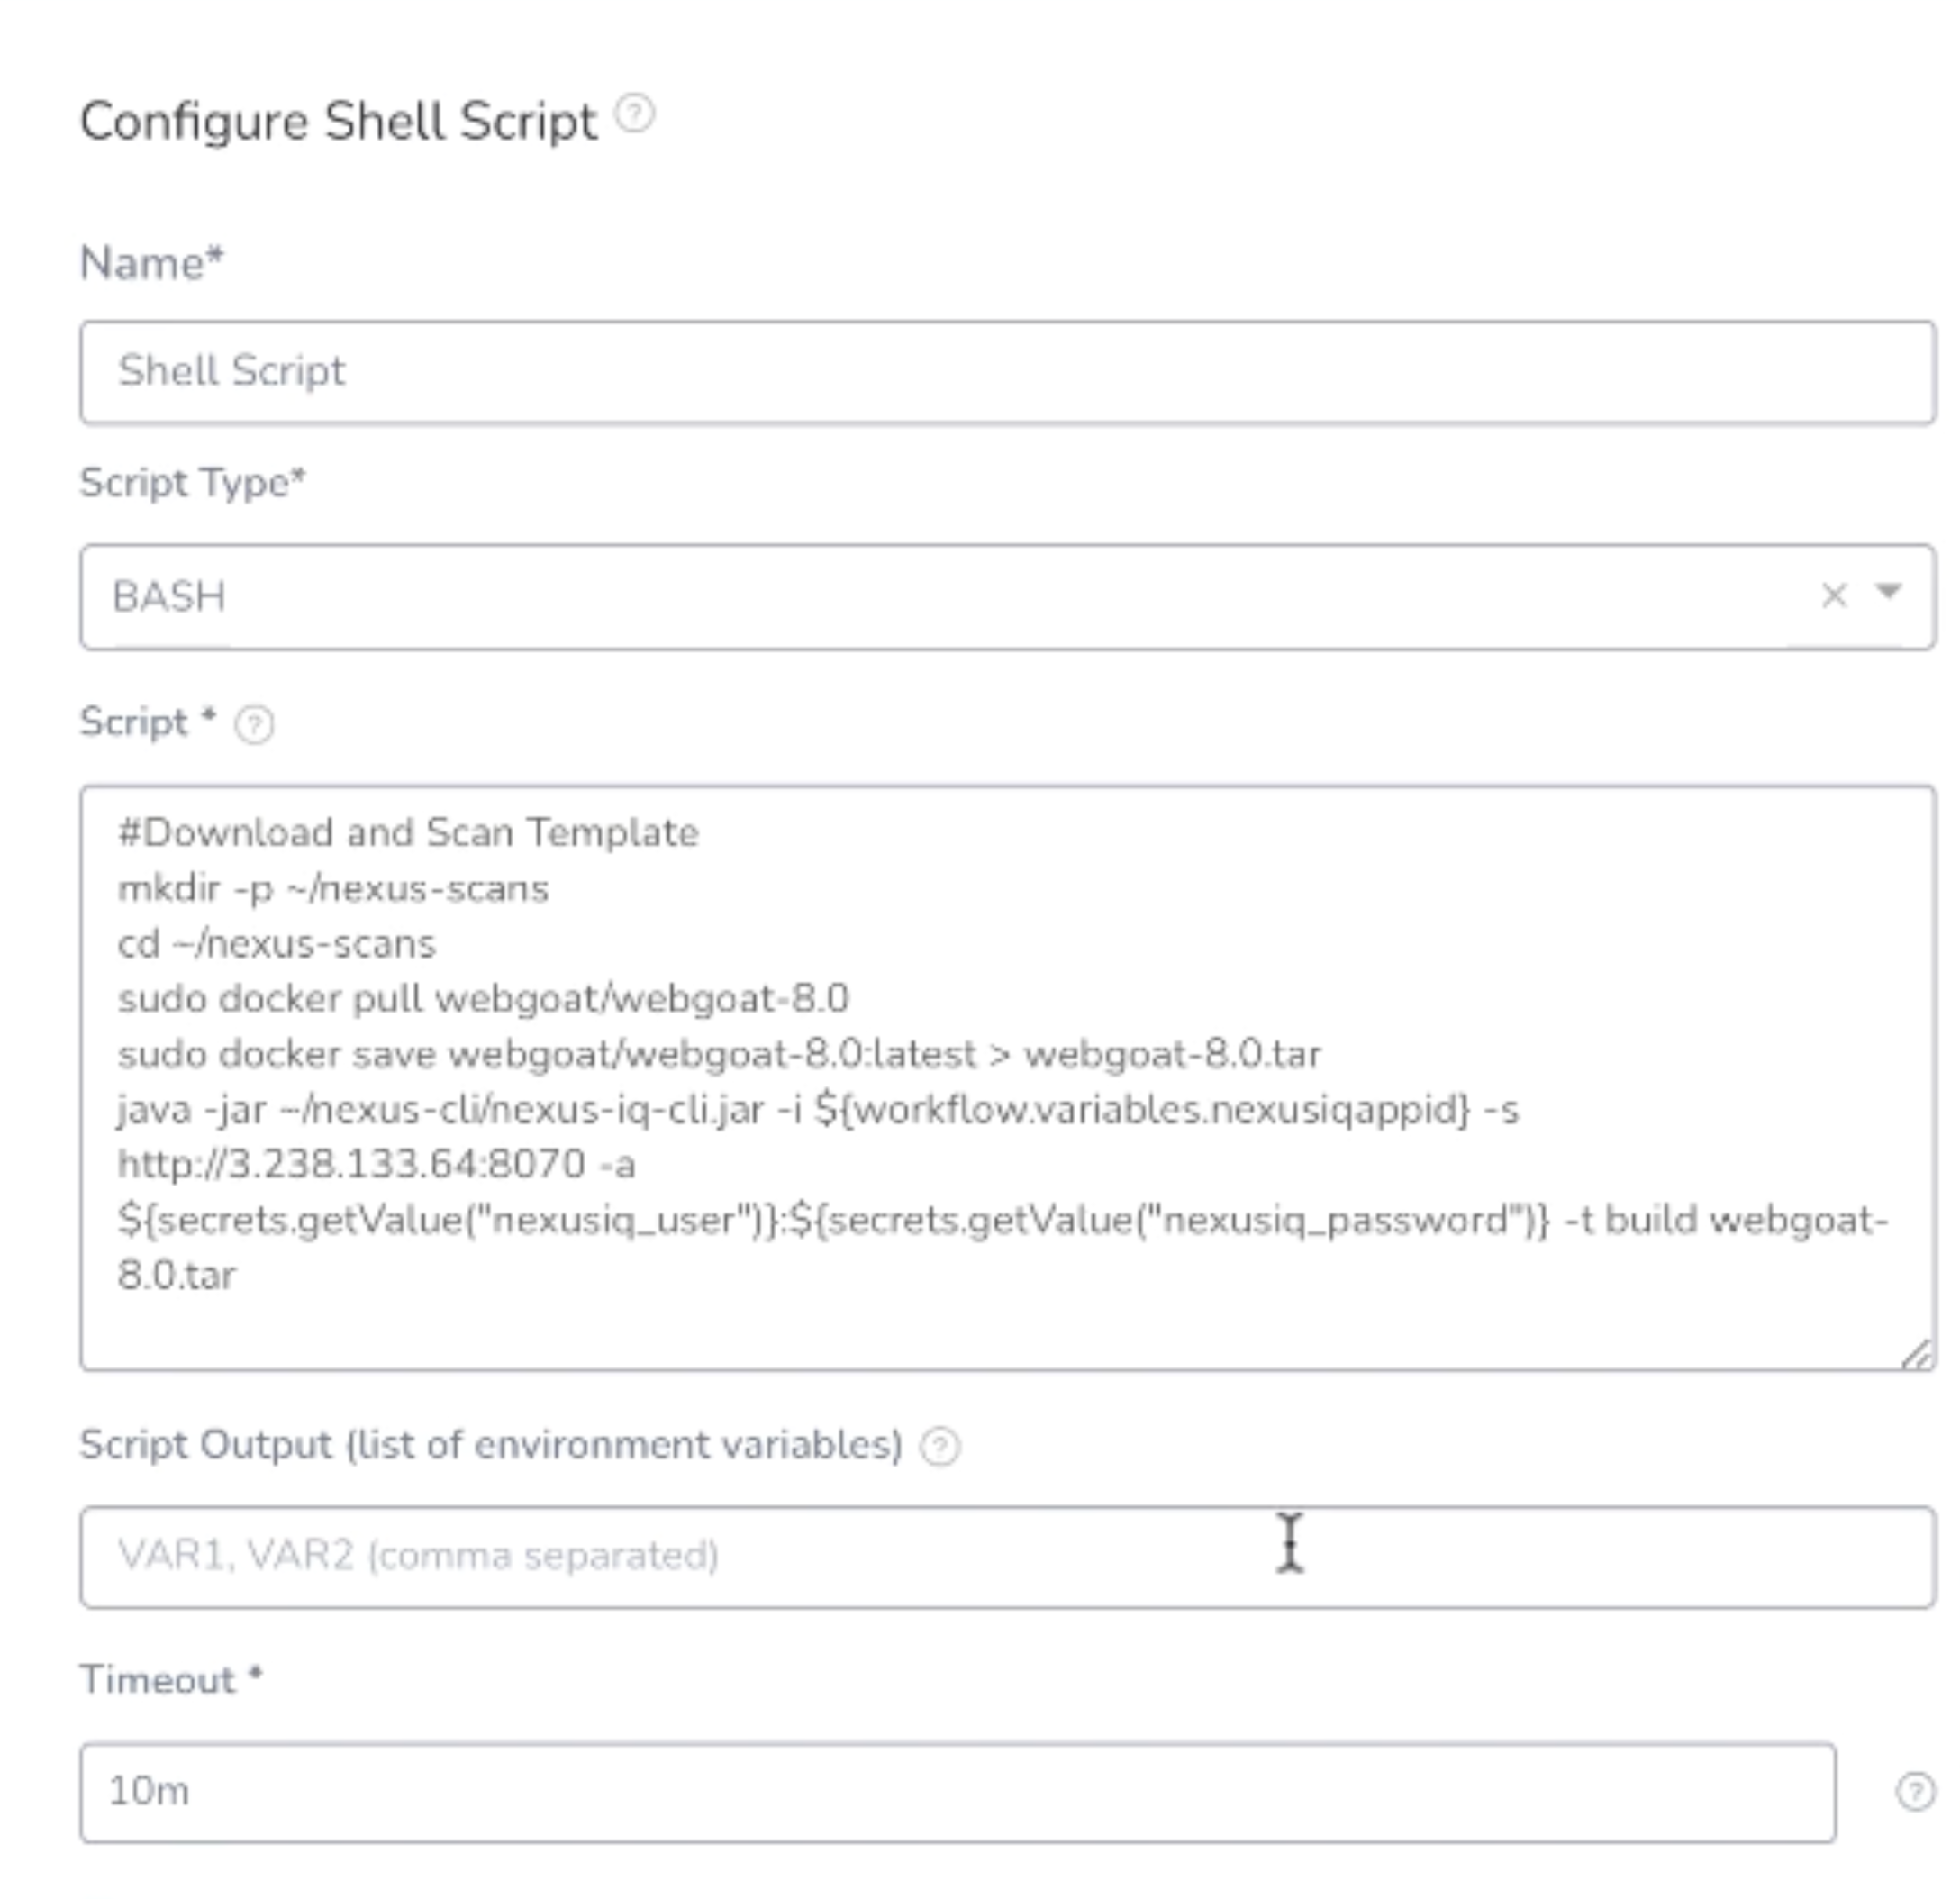
Click Next and fill out a basic shell script around what a Nexus IQ scan requires. Make sure to select the Delegate Selector [NexusIQScan] that was assigned to the Shell [CentOS] Delegate.
Name: Shell Script
Type: BASH
Script:
#Download and Scanmkdir -p ~/nexus-scanscd ~/nexus-scanssudo docker pull webgoat/webgoat-8.0sudo docker save webgoat/webgoat-8.0:latest > webgoat-8.0.tarjava -jar ~/nexus-cli/nexus-iq-cli.jar -i webgoat-application -s http:/<public_ip>:8070 -a <user>:<password> -t build webgoat-8.0.tar
Timeout: 10m
Delegate Selector: NexusIQScan

Once you click Submit, your Shell Script will be under Deploy Service.

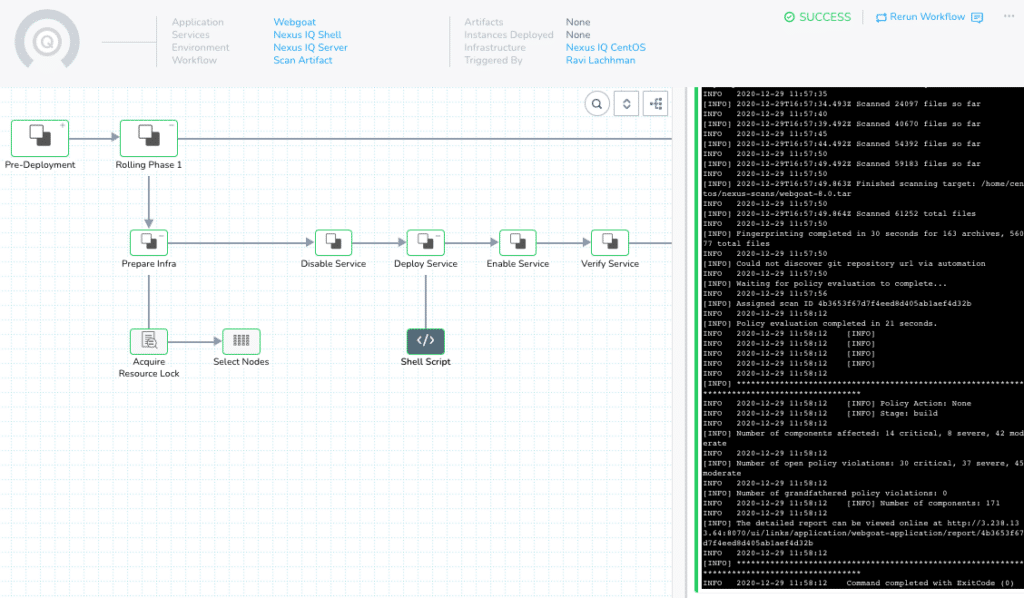
At this point, you can execute the call and see how a basic call from Harness looks. On the top right, click Deploy.

Hit Submit and watch your first scan be executed.

Navigate back to Nexus IQ to view your report!
http://<public-ip>:8070 -> Reports -> Reporting -> Webgoat -> View Report

With the basic integration/wiring out of the way, we can start to march towards operationalizing the scans.
Operationalizing Vulnerability Scans with Harness – Part Two
There is a lot of the art of the possible with the Harness Platform. In this example we went through installing Nexus IQ and wiring a functional Nexus IQ CLI call from the Harness Platform. In part two, we will start to leverage more operational pieces such as the Harness Secrets Manager to store Nexus IQ credentials and introducing prompts and logic to stop the deployment if severe/critical vulnerabilities are found. Make sure to stay tuned and if you have not already, make sure to sign up for a Sonatype Nexus IQ trial and a Harness account, today!
